Agent Workflows
Overview
Agent Workflows are multi-step, human-in-the-loop runs that analyze code and pause for review before moving to the next step. Each step runs asynchronously, shows progress, and exposes results in the UI. You can approve or reject a step, optionally re-running with feedback, before continuing.
Supported Agent Workflows
- Code Analysis: Runs Code Structure Analysis and Complexity Analysis to surface dependencies, issues, and complexity metrics.
- For a full list of available workflows, see Supported Types.
RAG Support (Optional)
You can attach a Retrieval Augmented Generation (RAG) datasource to provide extra context. The RAG datasource must be ingested and indexed so the workflow can retrieve relevant content during analysis.
Prerequisites
- Access to the Agents module.
- A configured LLM Datasource (for example, OpenAI or Ollama).
- A configured Input Datasource for GitHub or AWS S3.
- Optional: a configured and indexed RAG Datasource (this guide uses QuickStartS3).
Workflow Inputs (Quick Reference)
- Workflow Name: Auto-generated; rename as needed.
- LLM Datasource: The model used for analysis.
- Input Type: GitHub or AWS S3.
- Datasource: The GitHub or S3 datasource to scan.
- Branch: Git branch to analyze (GitHub only).
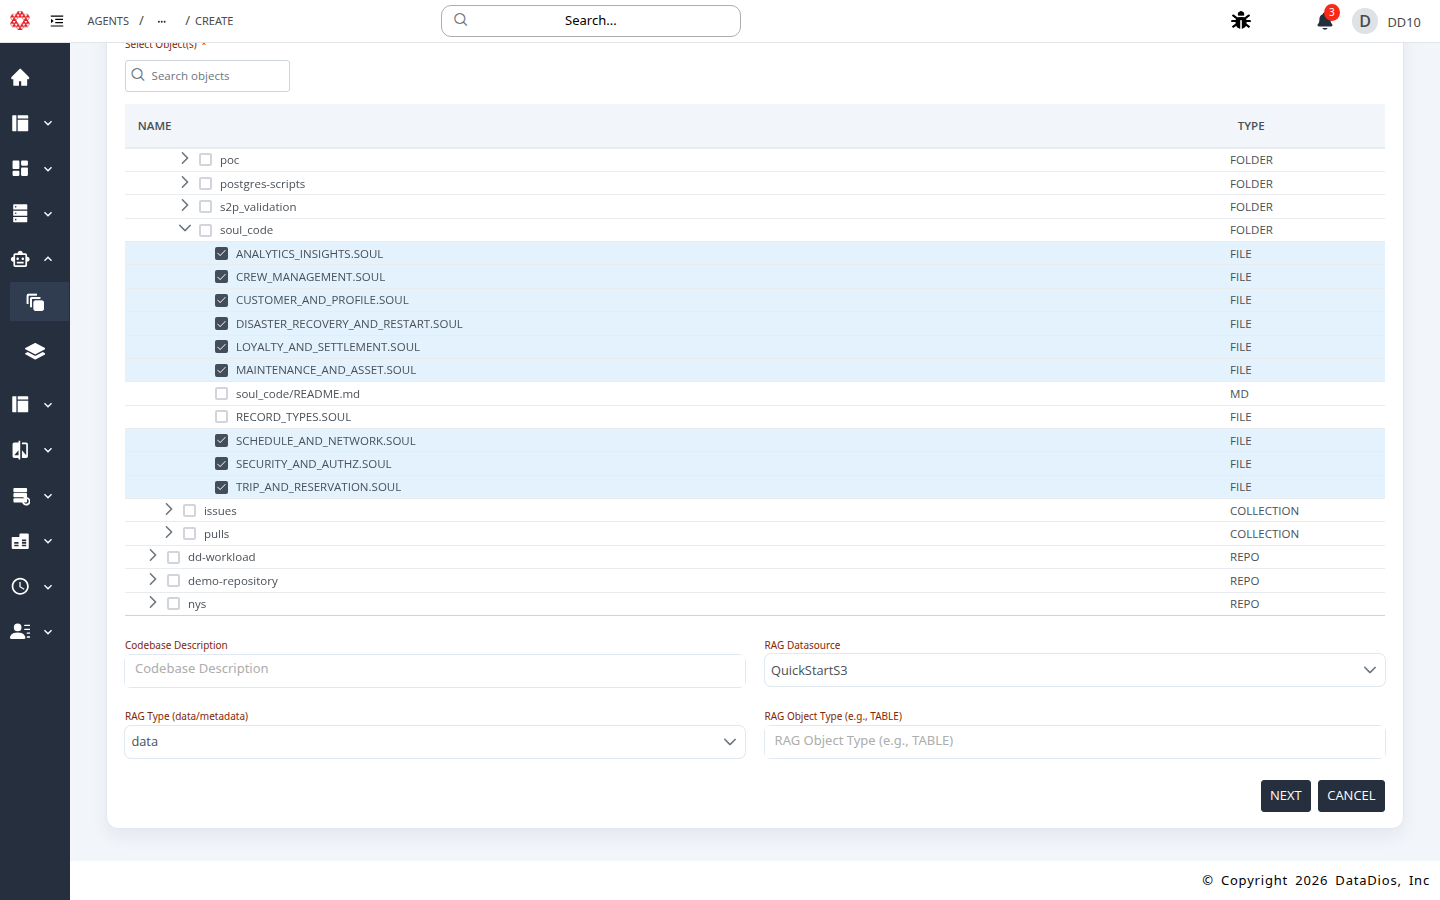
- Select Object(s): Repository, folder, or file to analyze.
- Codebase Description: Optional context to improve results.
- RAG Datasource: Optional context datasource (e.g., QuickStartS3).
- RAG Type:
dataormetadata. - RAG Object Type: Optional filter (for example,
TABLE).
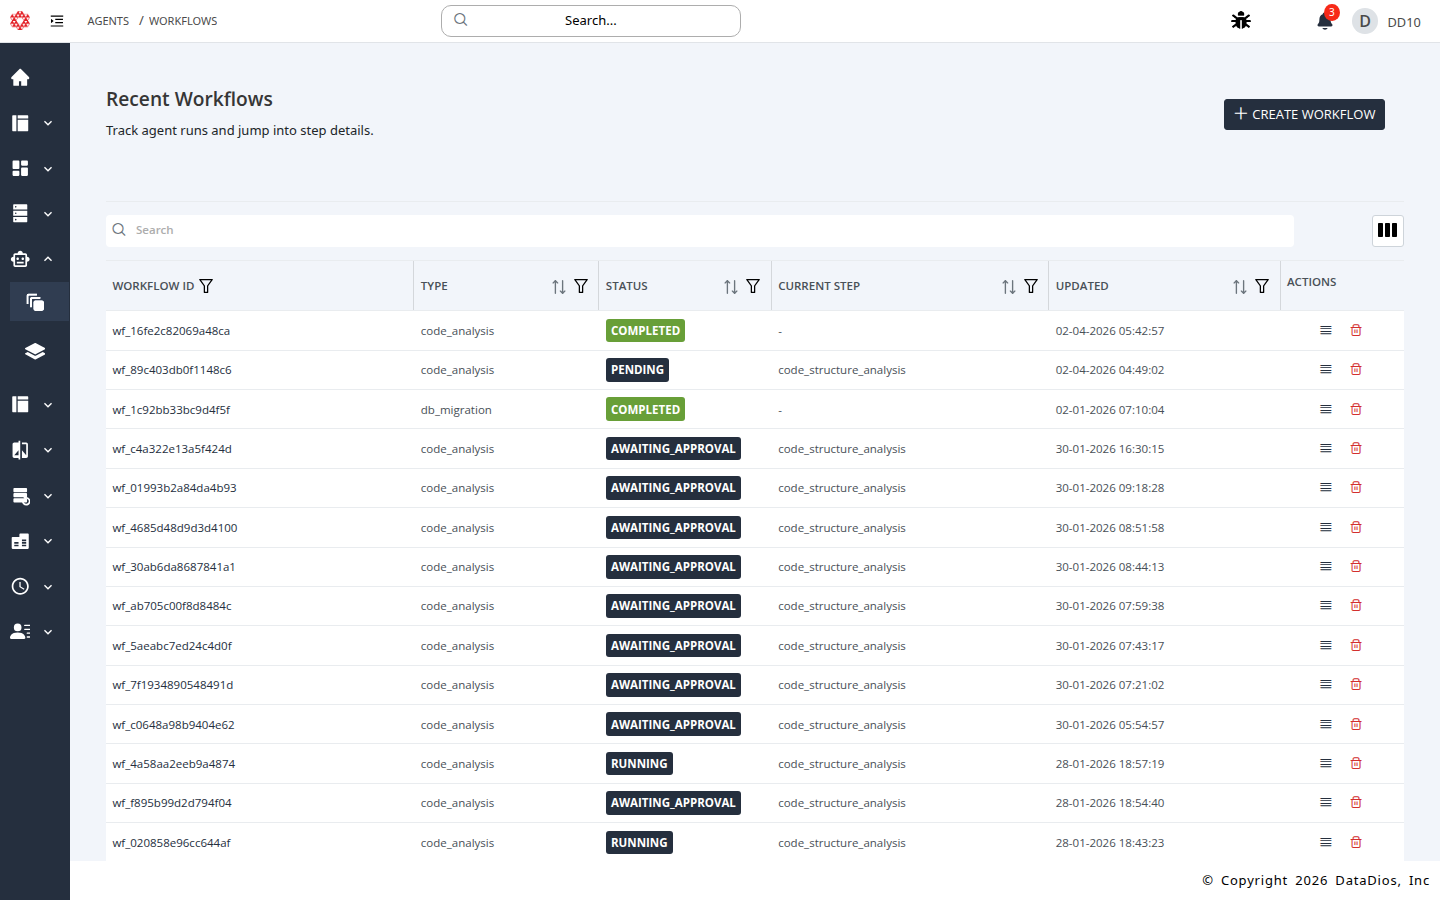
Workflow Statuses
Workflow status badges appear in the list view and at the top of each workflow.
- PENDING: Workflow created, waiting to start.
- RUNNING: A step is currently executing.
- AWAITING_APPROVAL: A step finished and needs review.
- COMPLETED: All steps approved and finished.
- FAILED: A step failed or the workflow stopped.
Step-by-Step: Create a Code Analysis Workflow
Step 1: Open Agents → Workflows
Navigate to Agents and select Workflows.
Step 2: Start a new workflow
Click CREATE WORKFLOW.
Step 3: Choose Code Analysis
Select Code Analysis and click NEXT.
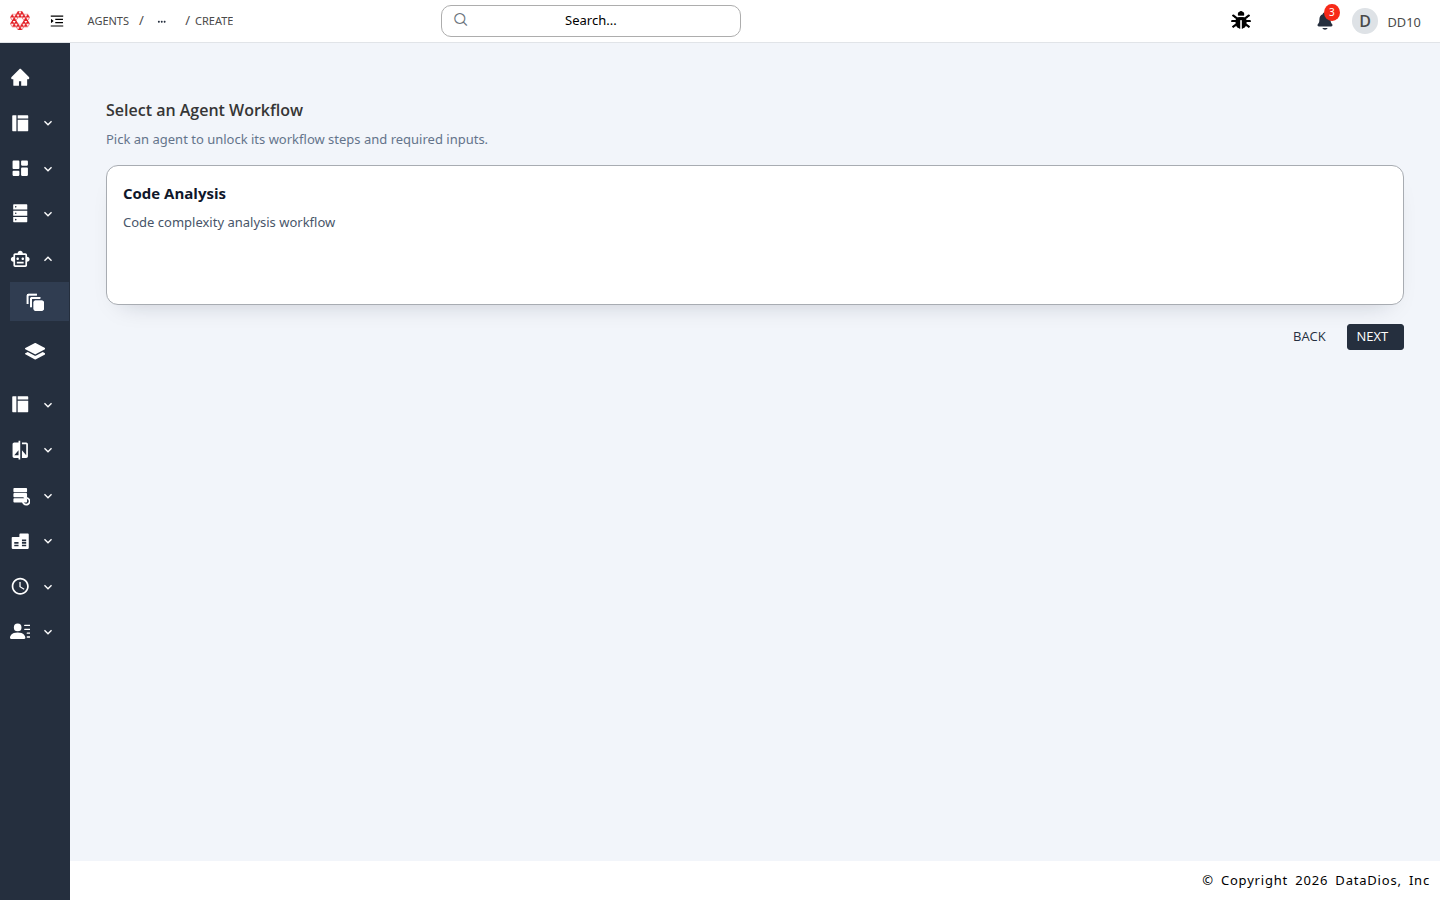
Step 4: Review the Workflow Inputs form
The Create Workflow form opens with required inputs.

Step 5: Configure required inputs
- Set LLM Datasource (example:
QuickStartOpenAI). - Set Input Type to GitHub or AWS S3.
- Select Datasource (example:
QuickStartGit). - Choose the target repo or object in Select Object(s).
- Keep or update Branch if using GitHub.

Step 6: Configure RAG inputs (optional)
- Set RAG Datasource to QuickStartS3.
- Set RAG Type to
dataormetadata. - (Optional) Set RAG Object Type to filter by object type.
Step 7: Create the workflow
Click NEXT to create the workflow and open the first step.
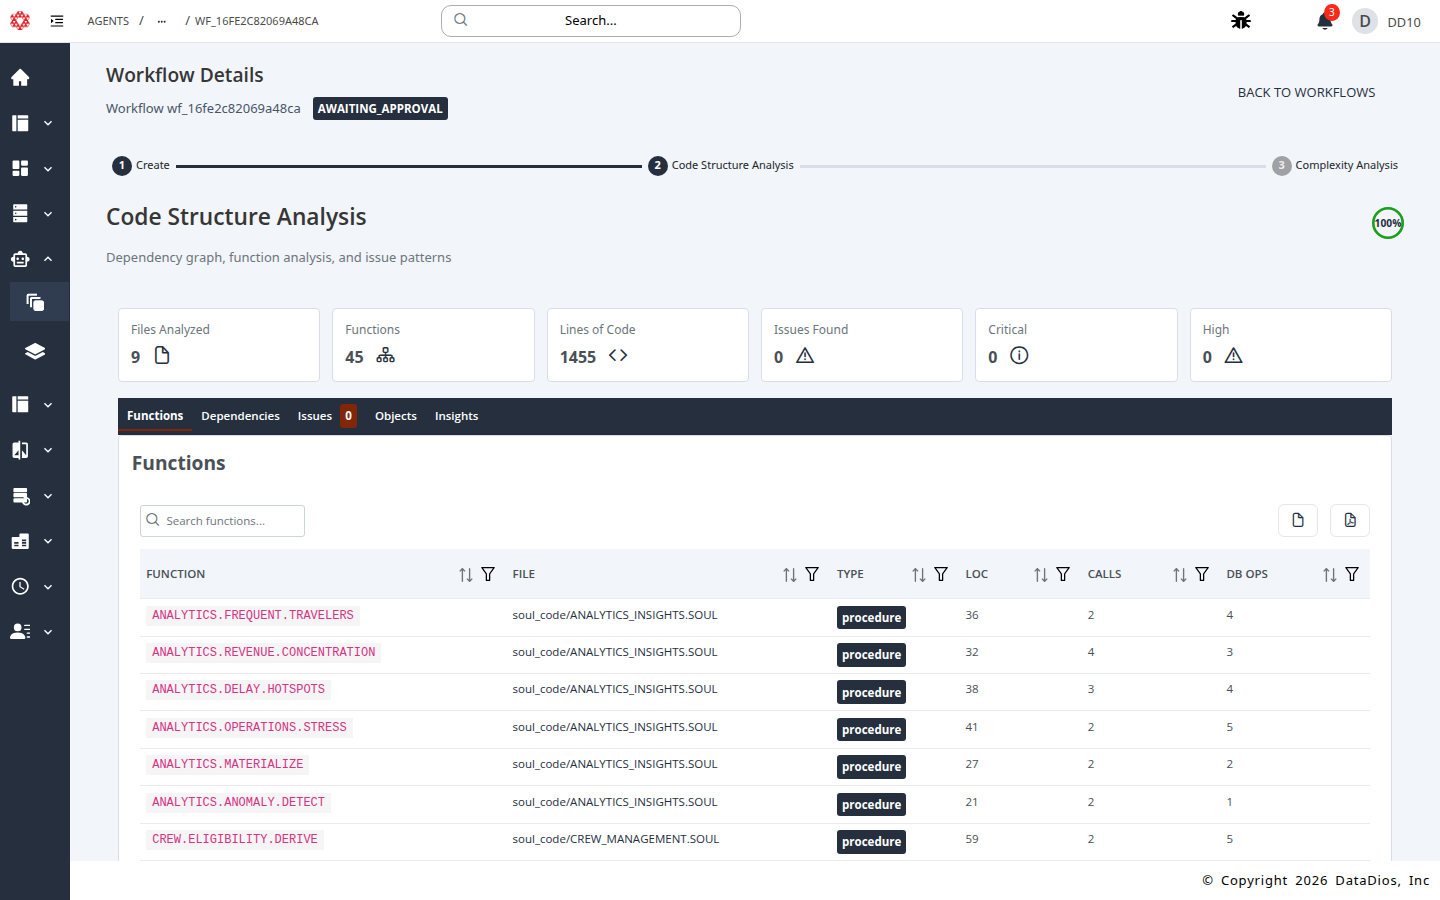
Step 8: Open Code Structure Analysis
Review the prompt settings, then click RUN CODE STRUCTURE ANALYSIS.

Step 9: Wait for completion and review results
Wait for progress to reach 100% and review the results as they load.
Step 10: Approve or reject the step
Use APPROVE to continue or REJECT with feedback to re-run the step.
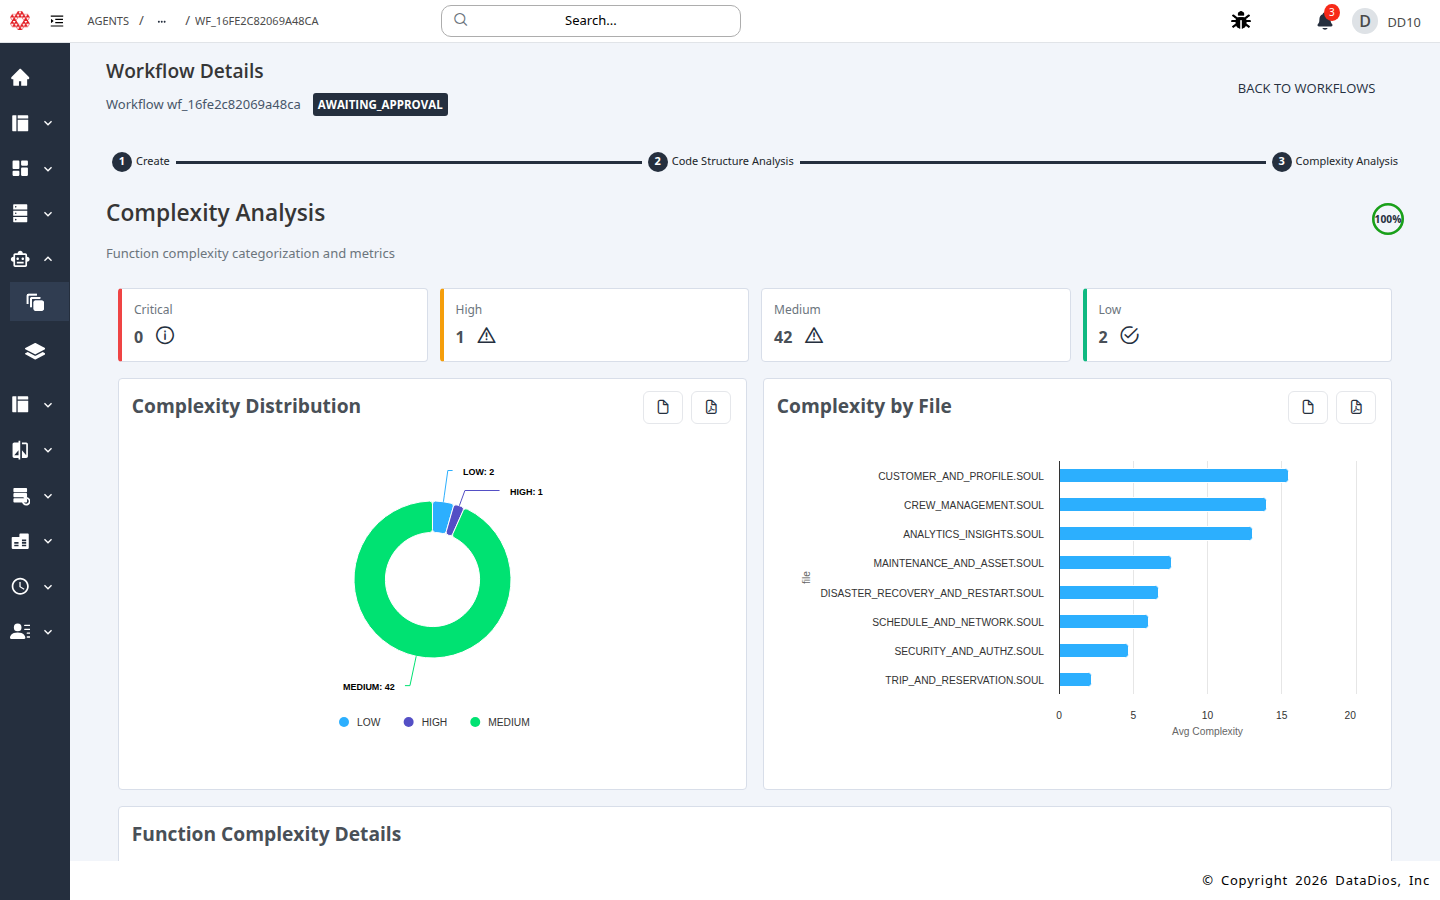
Step 11: Review Complexity Analysis
Open the Complexity Analysis step to review charts, function-level scores, and recommendations.
Step 12: Final approval
Approve or reject the Complexity Analysis step to complete the workflow.
Results
After completion, you can review:
- Files analyzed, functions, and lines of code
- Dependencies, objects, issues, and insights
- Complexity distribution and function-level scores
- Recommendations for high-complexity areas
Best Practices
- Start with a focused repo or folder to keep runtime manageable.
- Use the Branch field to target a specific release or commit line.
- Add a Codebase Description to improve analysis accuracy.
- Enable RAG when you have documentation or metadata that should inform analysis.