AI Studio
Overview
AI Studio is your intelligent workspace for data exploration and analysis — combining SQL execution, AI-powered chat, and multi-format result visualization. Write queries, generate SQL from natural language, and explore your data — all within a unified, worksheet-based interface.
Key Components
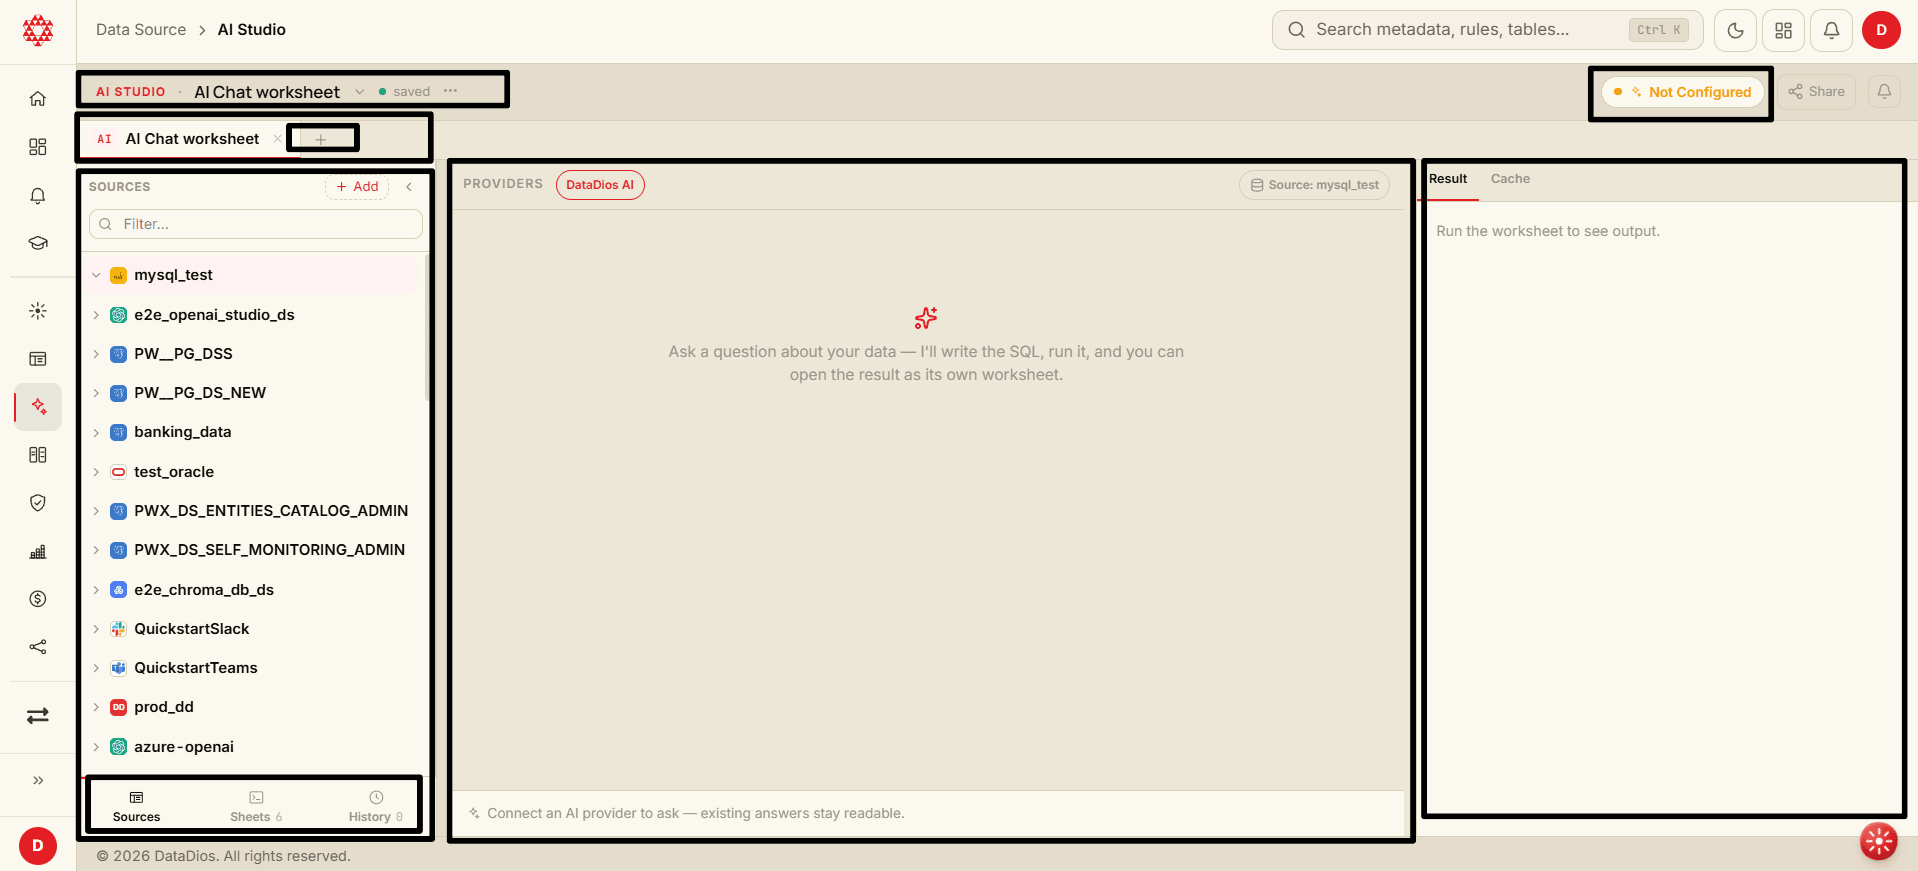
1. Catalog Rail (Sources Sidebar)
The left sidebar displays all your connected datasources in a browsable tree. Expand any datasource to explore its databases, schemas, and tables. Use the search box at the top to filter sources quickly.
The sidebar has three bottom tabs:
- Sources — Browse all connected datasources
- Sheets — View and switch between your worksheets
- History — See your recent query history
2. Worksheet Tabs
Organize your work across multiple worksheets, each with a specific mode. Every tab shows a mode badge (SQL, AI, etc.) and the worksheet name. Click the + button to create a new worksheet.
Available worksheet modes:
- SQL — Write and execute SQL queries with syntax highlighting
- AI Chat — Ask questions in natural language and get AI-generated answers
- Python — Notebook-grade editor with chart and dataframe output (coming soon)
- Script — Batch/shell commands on a worker (coming soon)
- Pipeline — Chain SQL, Python, scripts, and AI into ordered steps (coming soon)
3. SQL Editor Panel
Write and edit SQL queries with syntax highlighting. The editor provides three view modes:
- Sql — Standard SQL editing view
- Rendered — Formatted/rendered view of your query
- Conversation — View the AI conversation history for this worksheet
4. Worksheet Header
The header bar shows:
- AI STUDIO label with the current worksheet name
- Save status indicator (saved, saving, etc.)
- Worksheet menu (rename, star, save as new, share, delete via the ... menu)
- AI Status Pill — Shows whether an AI provider is configured (green = configured, orange = not configured)
- Share button
- Notifications bell
5. Result Panel
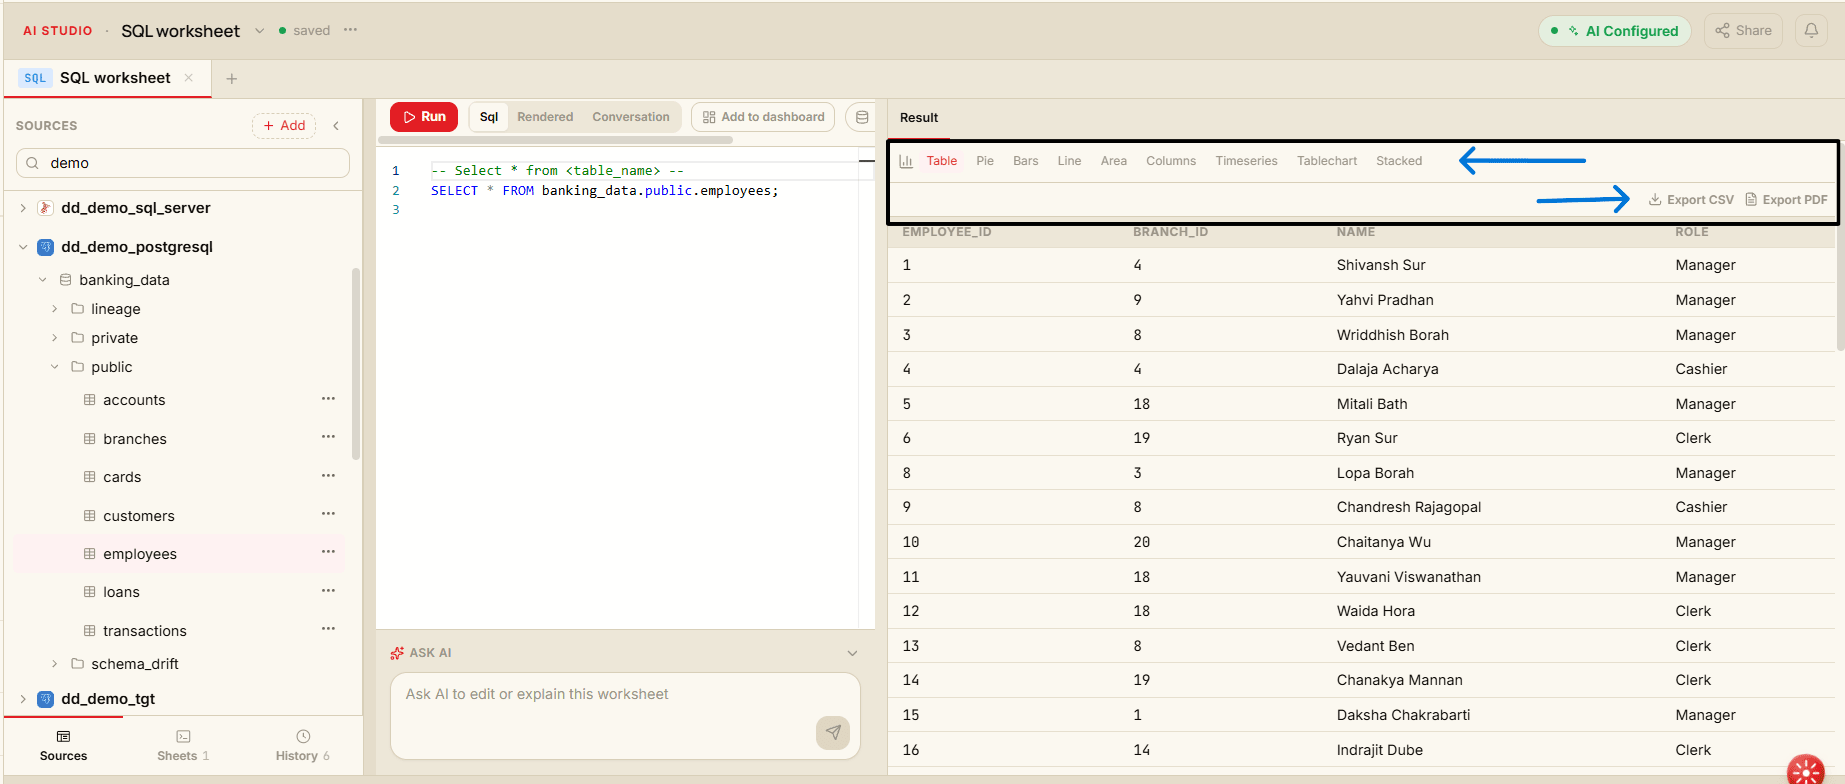
The right-side panel displays query output after execution. Before running a query, it shows "Run the worksheet to see output." After execution, results appear in a structured table with options to switch between different visualization types.
6. Query Controls
- Run button to execute the current query
- Add to dashboard option to pin results to a dashboard. You are asked for a Name
(required) and an optional Description before it is pinned — the name is prefilled from
the query, so rename it to something you will recognise on the dashboard later. The dialog's
Pinning from line names the data source and the database the query ran in, such as
pg_demo · sales_b(on Databricks, the catalog), or only the data source when the query did not run in a chosen database. It still shows the database the query ran in if you have since switched the worksheet to another one. On the dashboard, point at the widget and select the Show SQL (</>) button in its action bar to see the query behind the widget. The query is read-only, and Re-run executes it again for fresh data. Only the dashboard owner sees this; people you share the dashboard with do not. - Source selection prompt — If no source is selected, you'll see "Select a source to run SQL"
Getting Started
Step 1: Access AI Studio
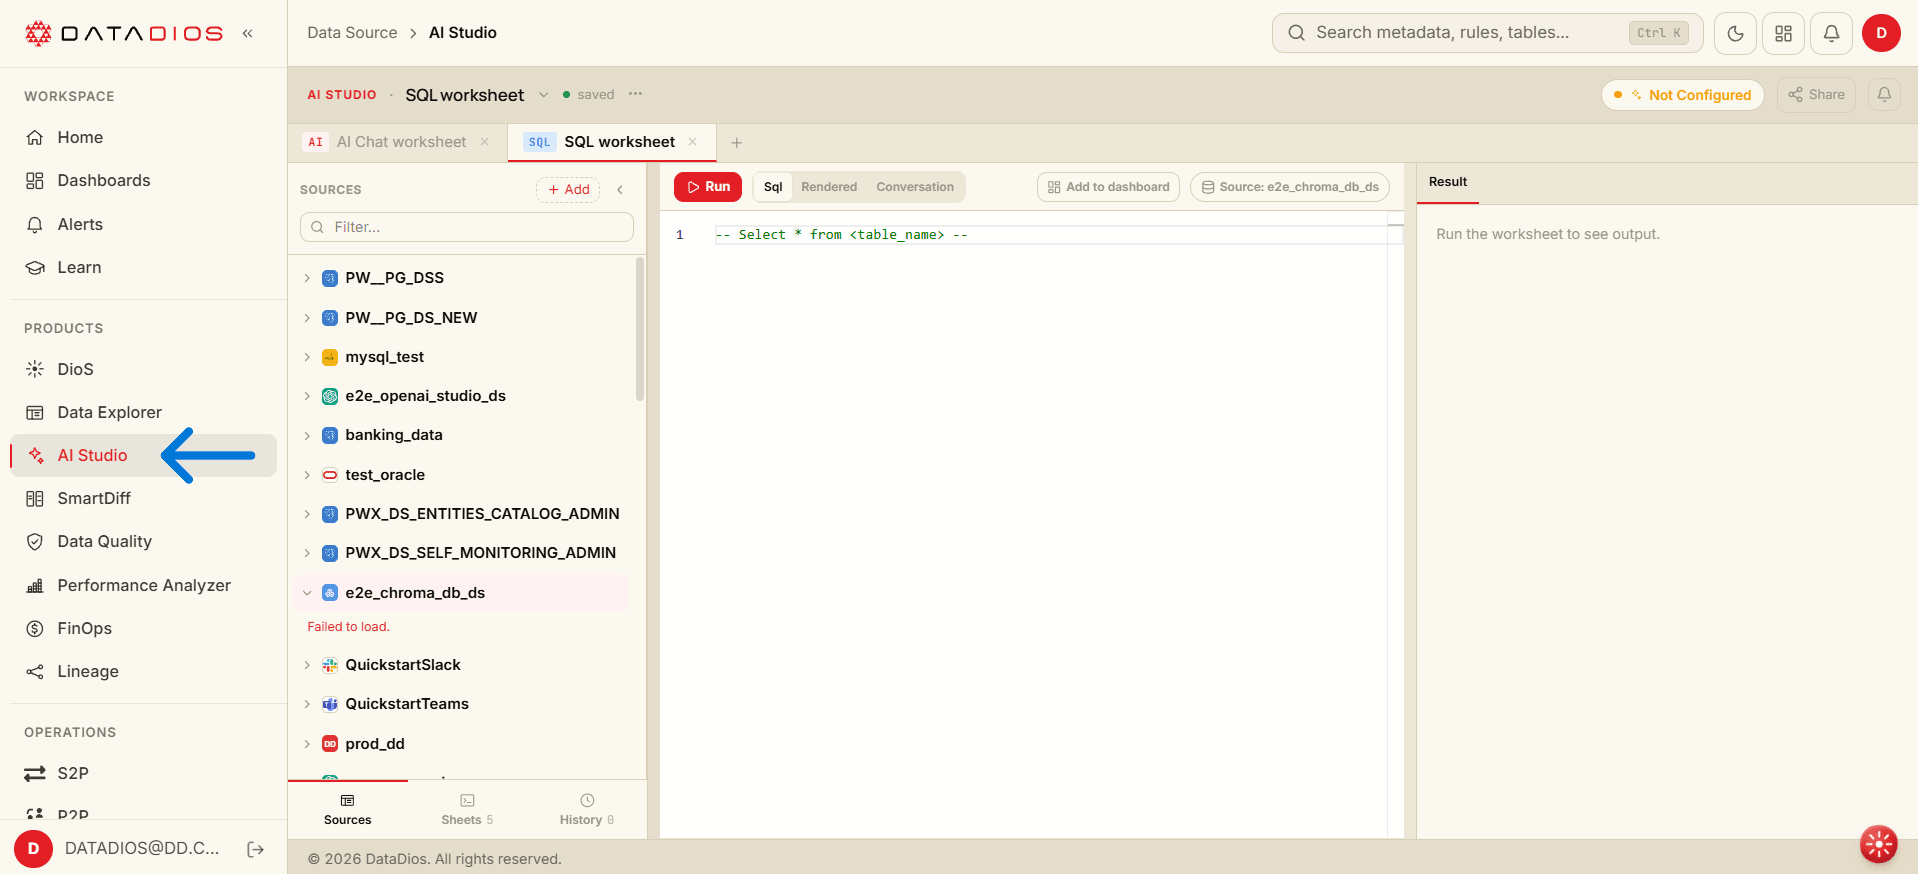
Navigate to AI Studio from the DataDios left navigation menu under Data Source.
Step 2: Browse and Select a Datasource
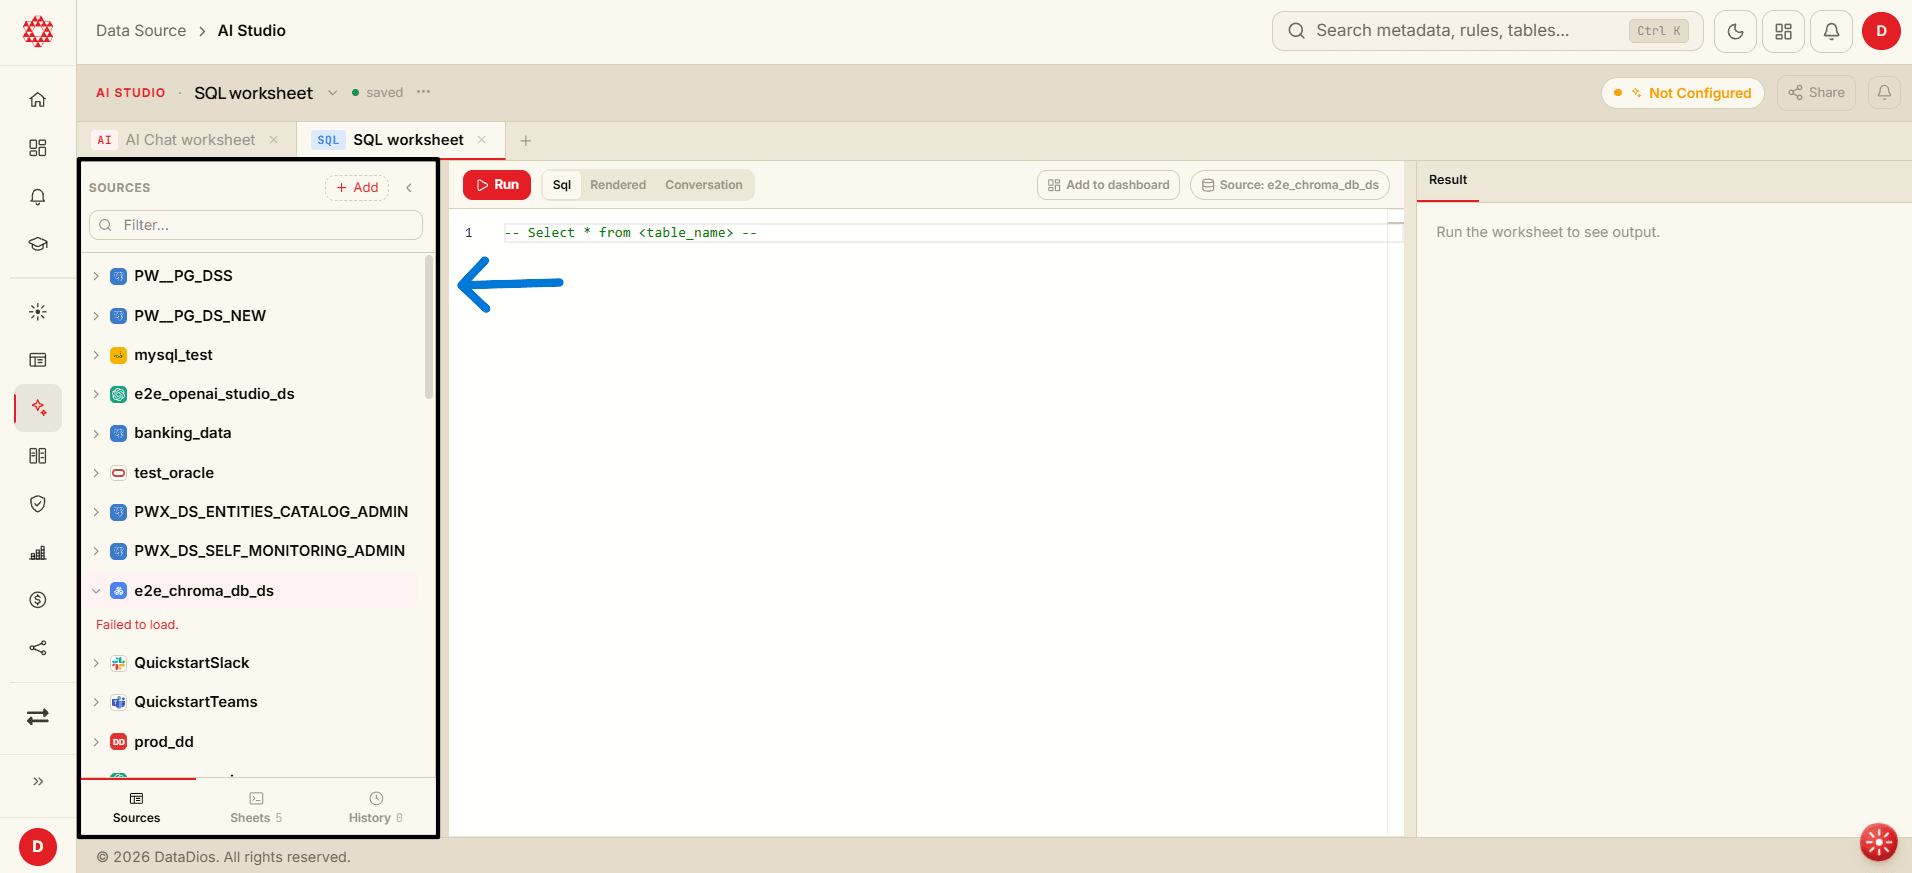
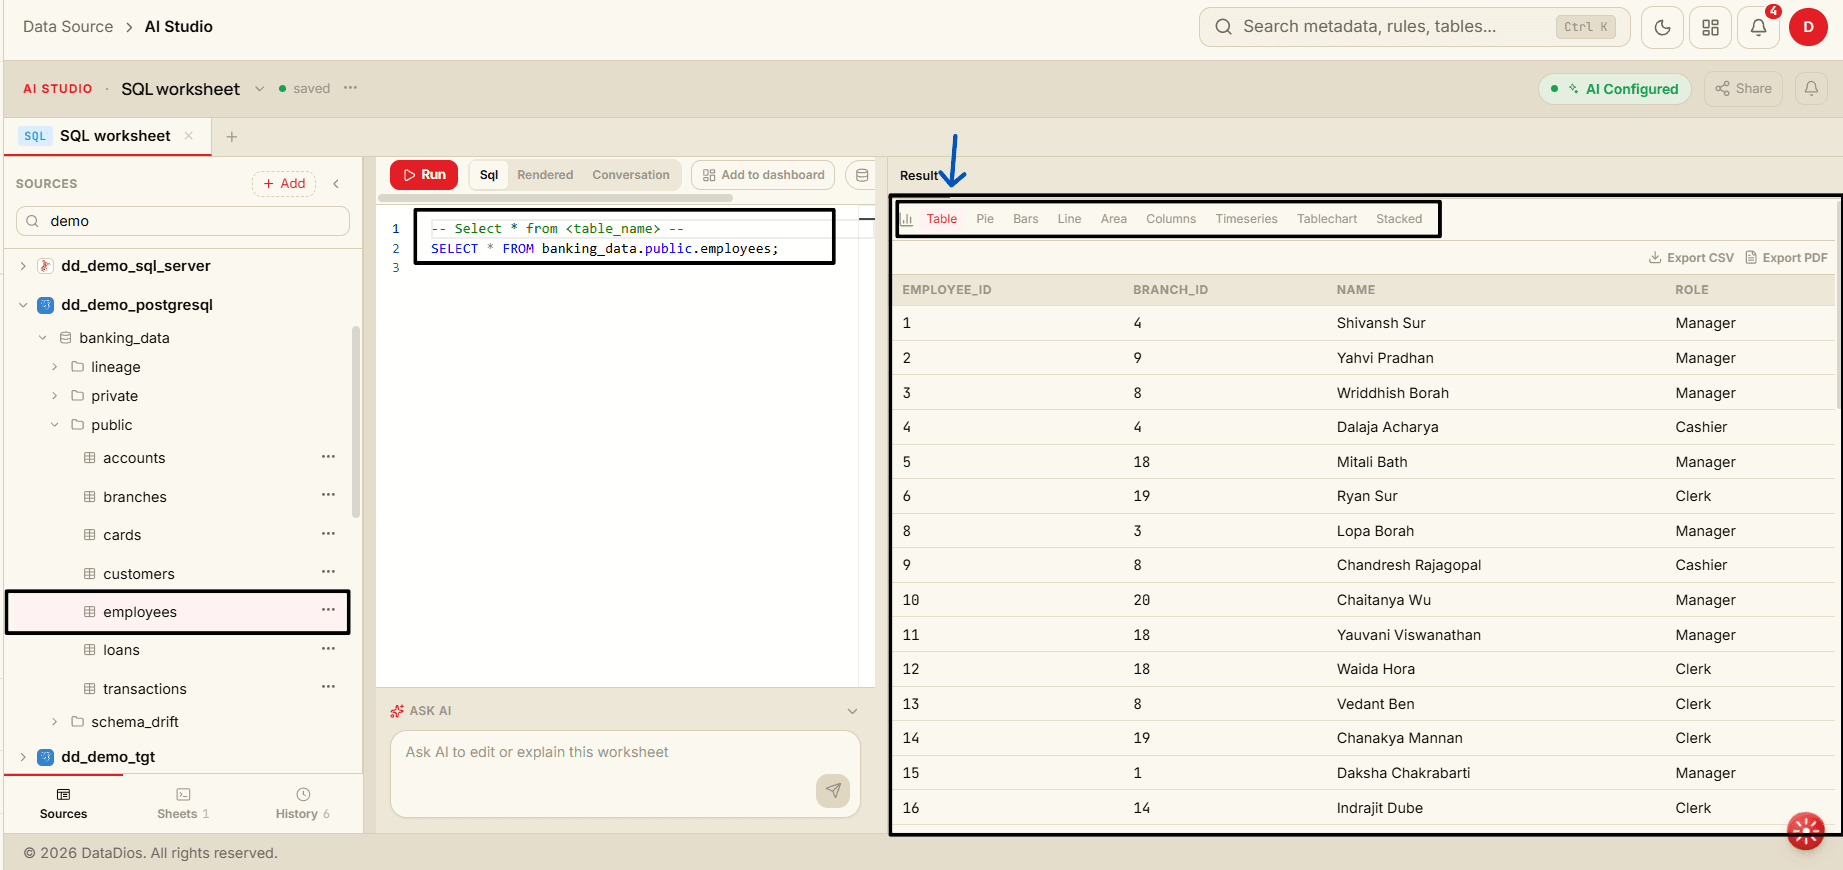
In the Catalog Rail (left sidebar), browse your connected datasources. Expand a datasource to see its databases, schemas, and tables. Select a source to set it as context for your worksheet.
Step 3: Create a Worksheet
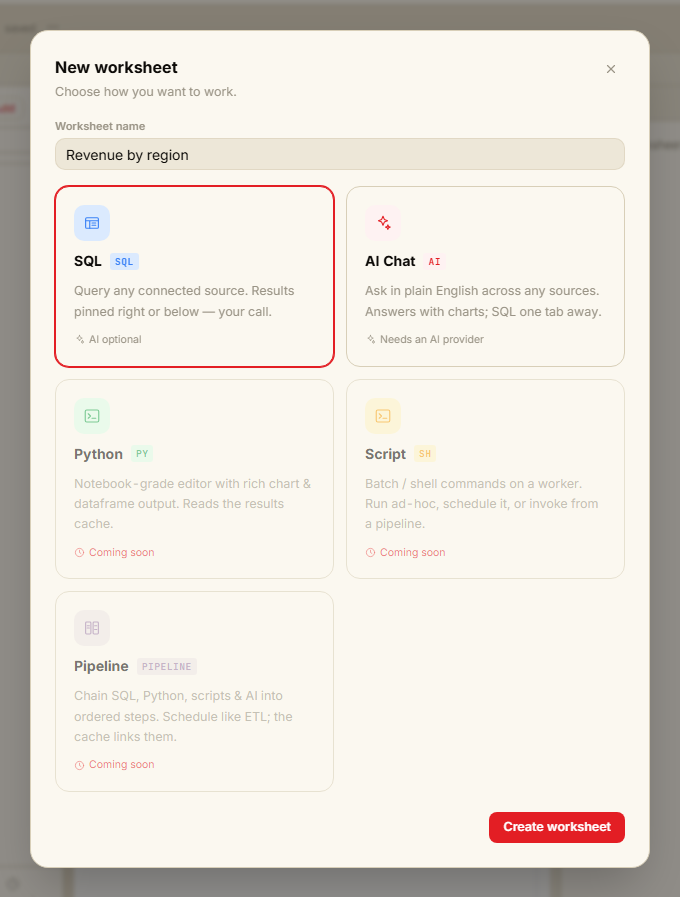
Click the + button in the tab bar to open the New worksheet dialog:
- Enter a Worksheet name.
- Choose a mode:
- SQL — For writing queries directly
- AI Chat — For natural language interaction
- Click Create worksheet. The button stays disabled until you have entered a name and chosen a mode.
Python, Script, and Pipeline are marked Coming soon and can't be selected yet.
Step 4: Start Working
- SQL worksheet: Write your query in the editor and click Run
- AI Chat worksheet: Type a question in natural language and get AI-generated SQL or answers
Workflow Examples
Example 1: Natural Language to Insight
- Create an AI Chat worksheet using the + button
- Ask: "Show me top 10 customers by revenue"
- Review the generated SQL
- Insert into a SQL worksheet and execute
- Analyze results in the Result panel
Example 2: Schema Exploration
- Expand a datasource in the Catalog Rail to browse tables
- Open an AI Chat worksheet and ask: "What tables contain customer information?"
- Receive schema overview
- Query specific tables based on AI guidance
Example 3: Query Optimization
- Write your initial query in a SQL worksheet
- Switch to an AI Chat worksheet and ask: "How can I optimize this query?"
- Review AI suggestions
- Apply optimizations and compare execution time
Result Viewer
The Result Panel displays query results with multiple visualization options. After running a query, use the chart-type switcher to change how results are displayed.
View Options
The chart-type switcher is a toolbar row of clickable type buttons: Table, Pie, Bars, Line, Area, Columns, Timeseries, Tablechart, Stacked. For applicable chart types (Bars, Line, Area, Columns, Timeseries, Stacked), axis and series selectors appear below the toolbar to let you configure which columns to plot.
You can also export results using the Export CSV (available in table view) and Export PDF buttons.
Charts in results
After you run a query in a SQL worksheet, or one that comes back from the AI assistant, DataDios looks at the shape of each statement's result and may draw it as a chart automatically — you don't have to pick a chart type yourself. A date or time column together with one number column draws as a line, with buttons to switch to Bar or Table instead. A column of text labels together with one number column draws as a bar, with Bar and Table to switch between. A single number is shown as a card, and anything less clear-cut stays a table: no obvious category or time column, more than one candidate column, no rows, or more than one number column. That last case is usually a list of records, such as customers with an ID and a zip code, where the numbers aren't amounts worth charting; you can still pick a chart for it yourself. DataDios only draws a chart when it's confident the result supports one; otherwise it never guesses.
If working out a chart fails for a result, you'll see a short note above the table saying so, and the rows still display normally underneath.
When you pick a chart yourself, the column pickers follow the column types the server reports for each statement. Only columns it reports as numbers are offered as values, and only date or time columns as the Timeseries view's x-axis, whatever their values look like: a year stored as text isn't offered as a value, and a decimal that arrives as text is. A result the server doesn't type, such as a Python cell's, is judged by its values instead. A column holding numbers counts as numeric, and a column counts as a date only when every value is an ISO date (2024-01-31, optionally with a time) or an epoch timestamp.
While a result is shown as a suggested chart, Add to dashboard and Export PDF aren't available for it yet — exporting as CSV still works.
Table Display
- View results in a structured table format for clear and organized data presentation.
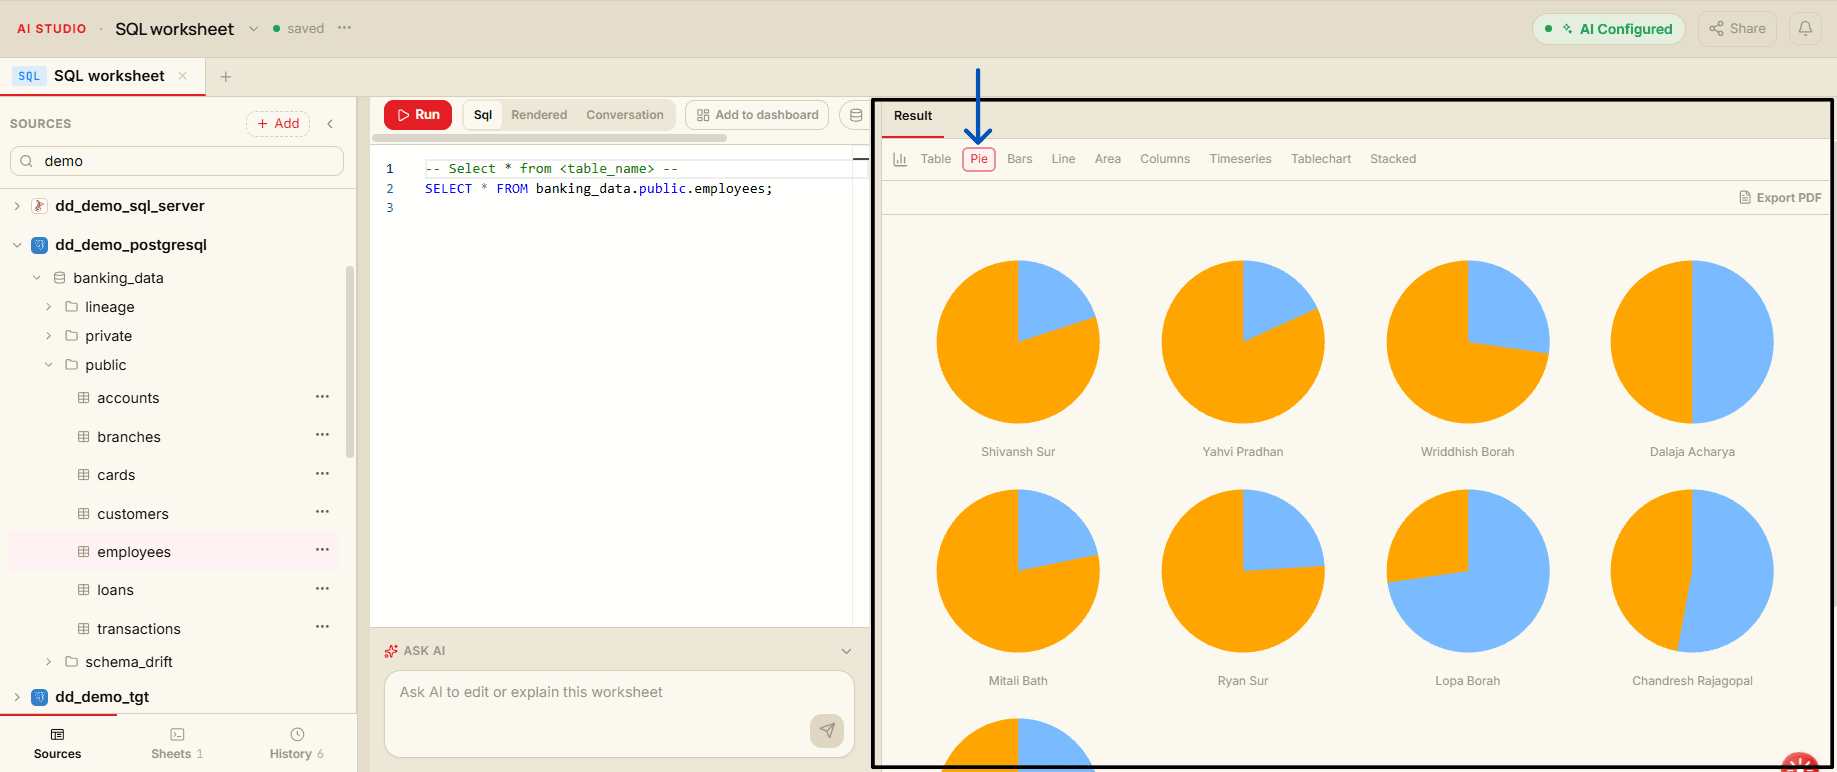
Pie Chart Visualization
- Visualize a breakdown of key identifiers for each row.
- Each pie chart corresponds to a single row, showing the relative contribution of selected numeric data fields.
Only numeric columns can be selected for key comparison.
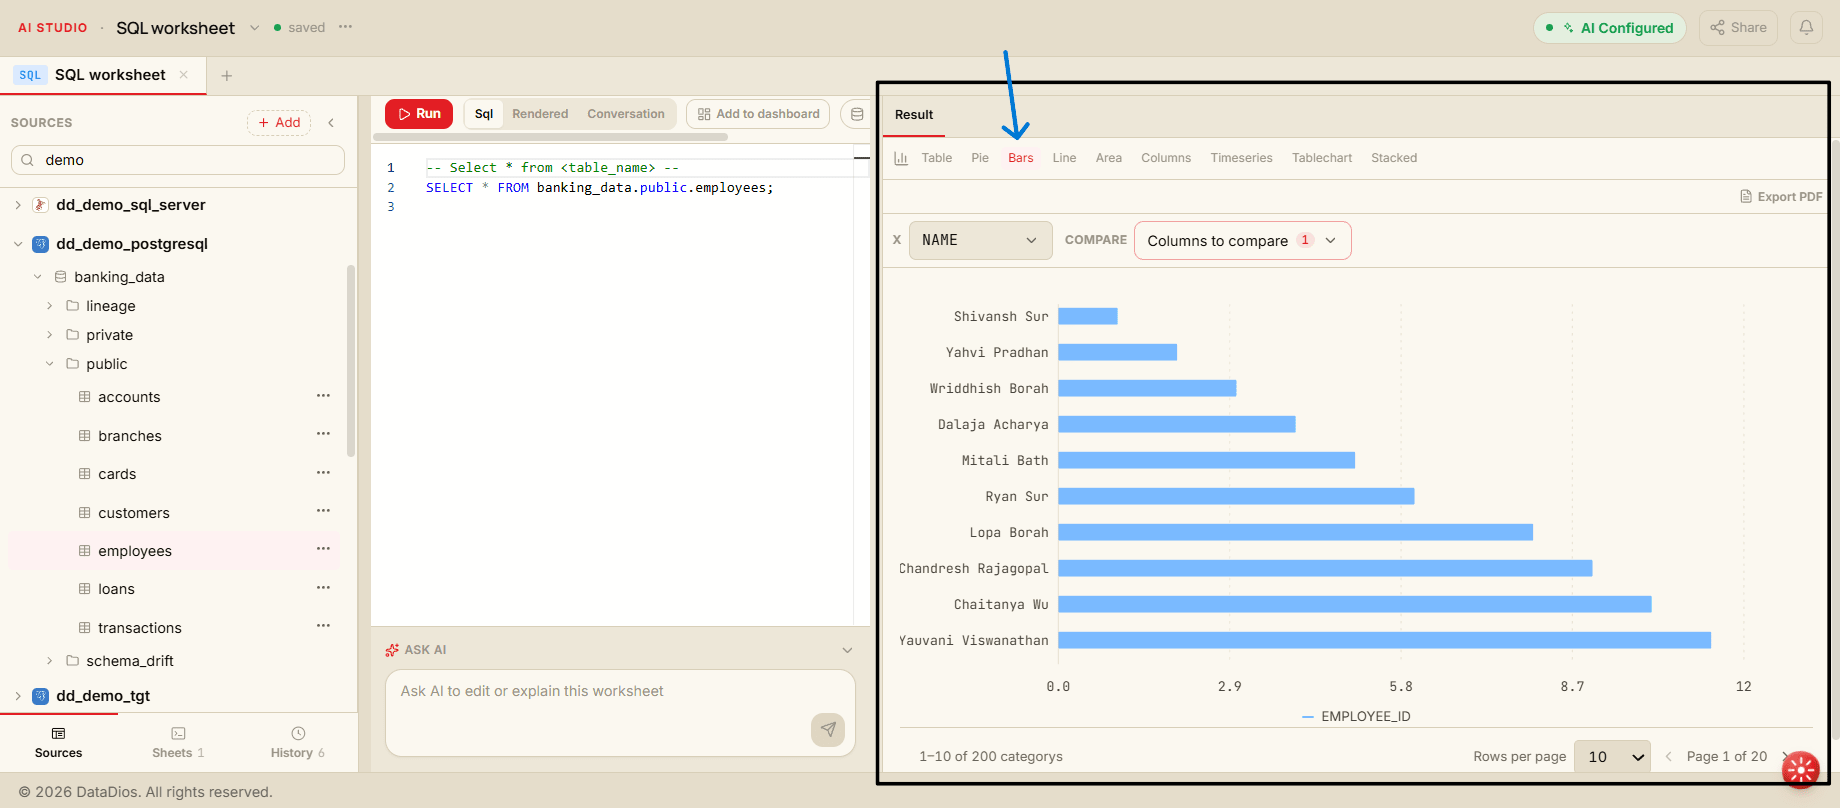
Bar Chart Visualization
- Visualize data trends across rows.
- Each bar represents a single row corresponding to selected numeric columns for easy comparison.
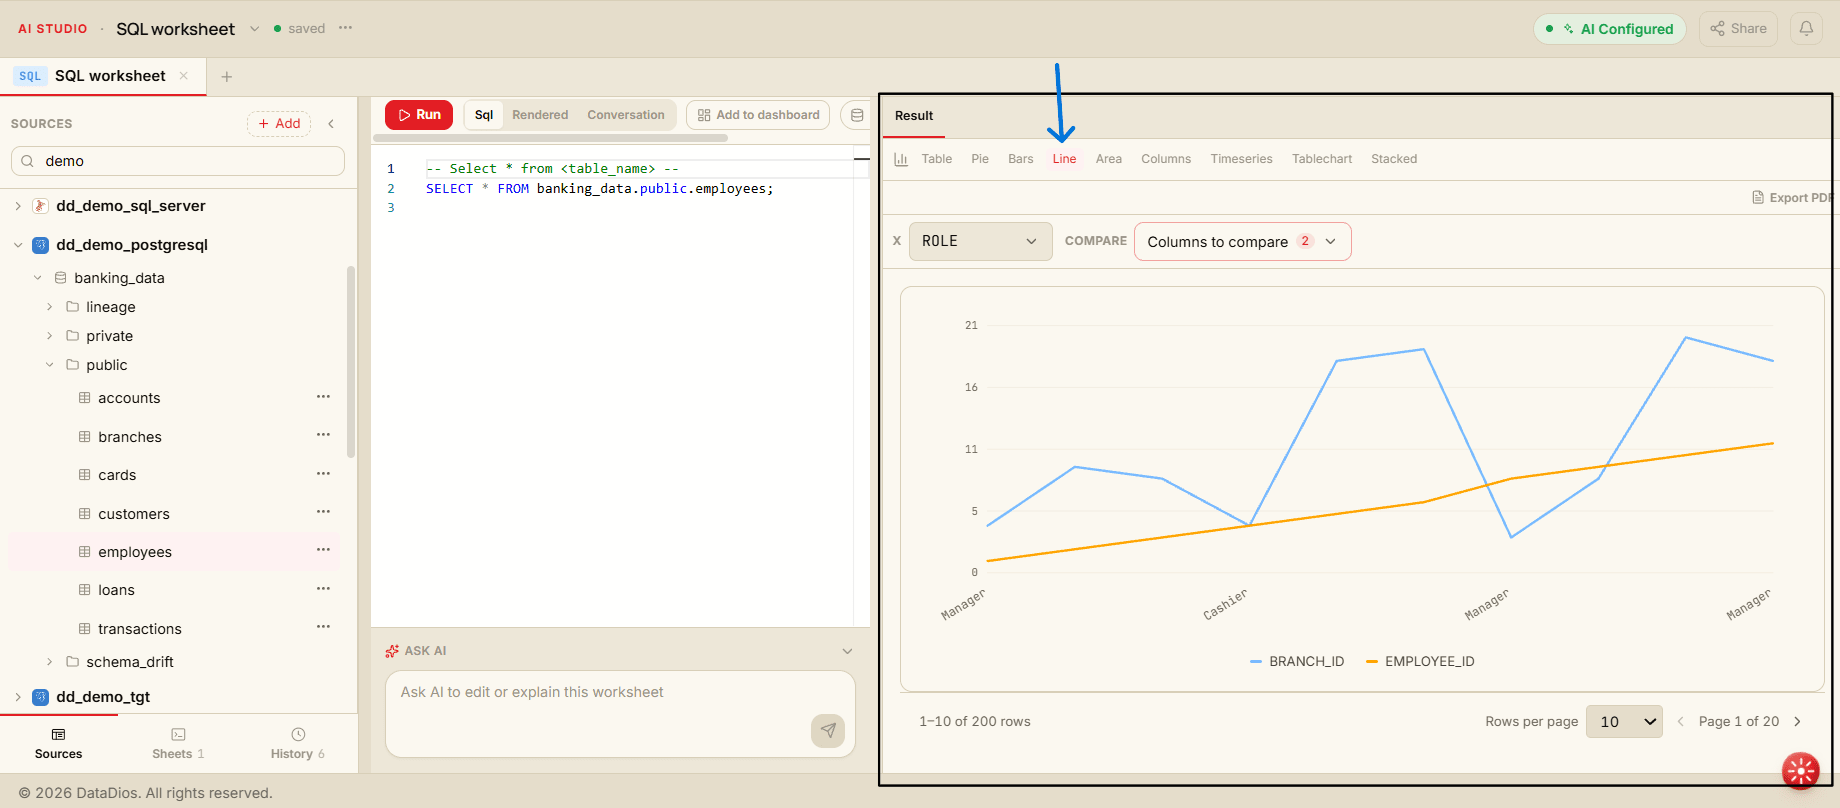
Line Chart Visualization
- Visualize data trends across rows.
- Each line represents a single column.
Only numeric columns can be selected for key comparison.
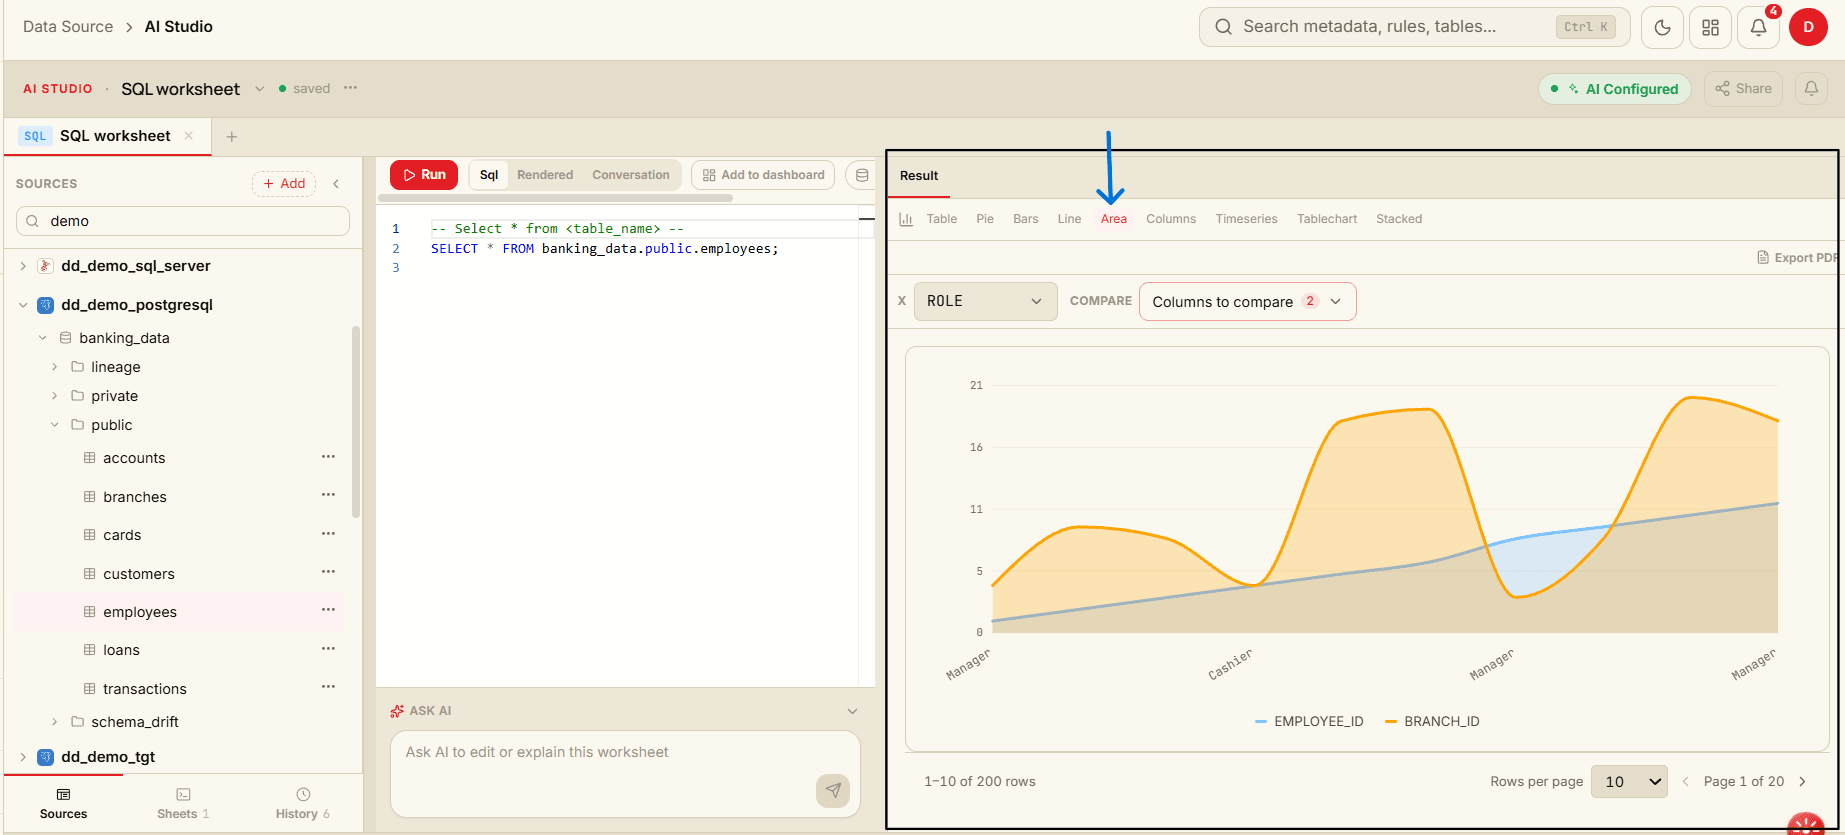
Area Chart Visualization
- Visualize cumulative data trends across rows.
- Each area represents a single column, filled beneath the line to show volume.
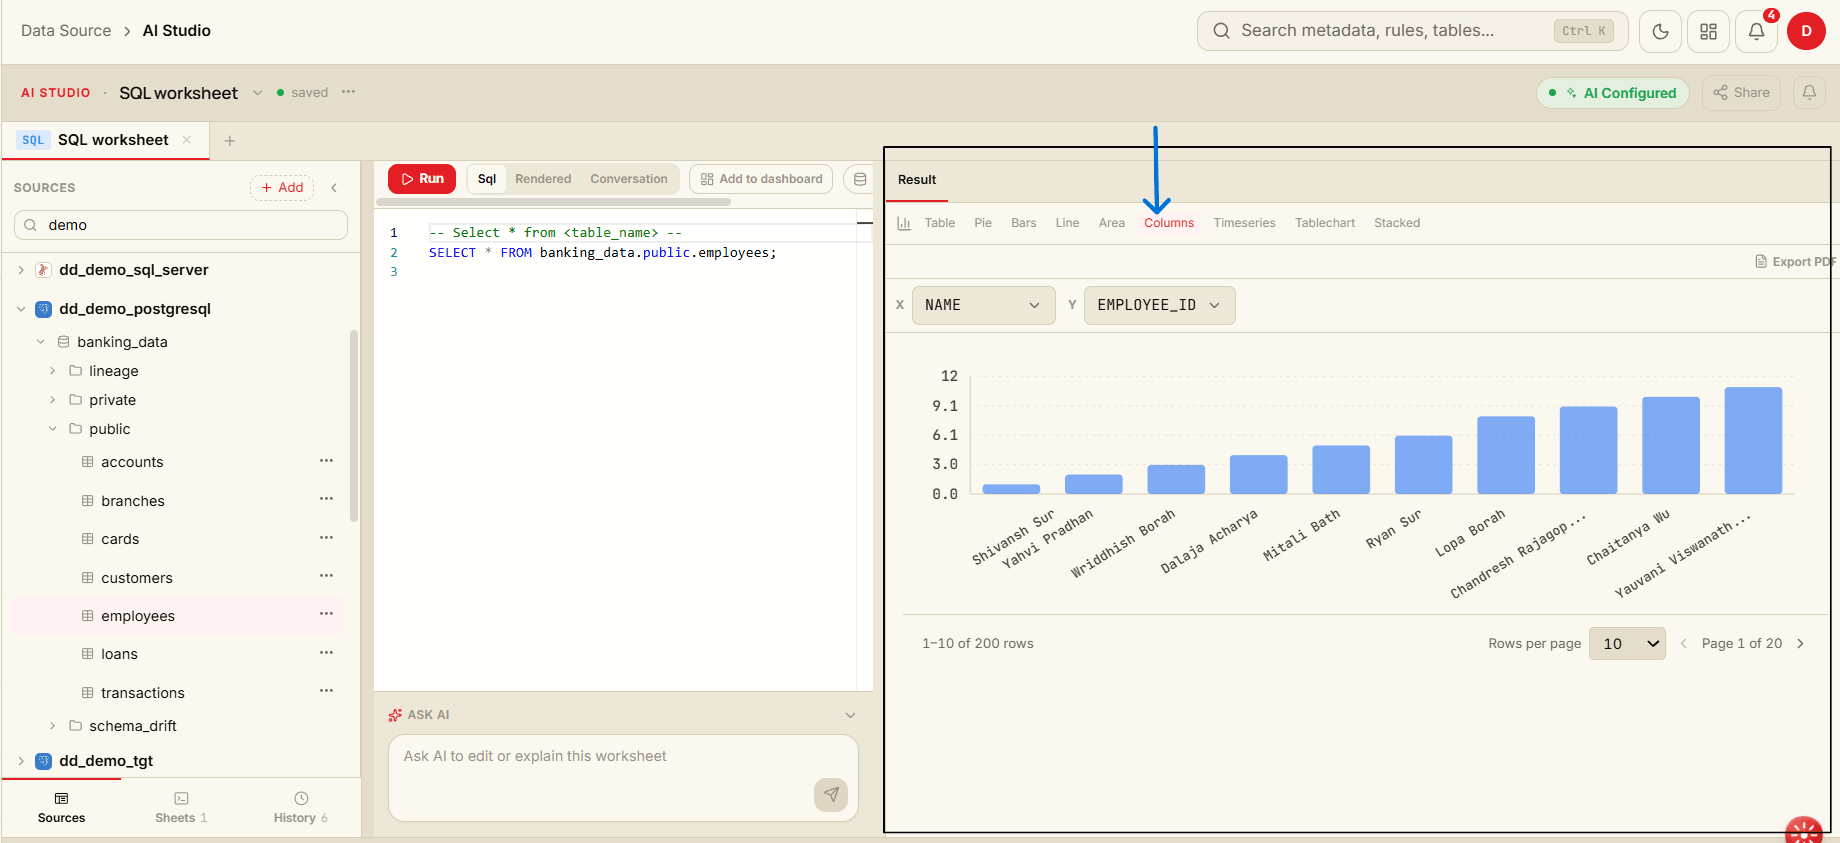
Columns Chart Visualization
- Visualize data distribution across rows with vertical column bars.
- Each column bar represents a single row for one-to-one column comparison.
Time Series Chart Visualization
- Visualize data trends over time.
- Plots a selected numeric column against a time-based x-axis for temporal analysis.
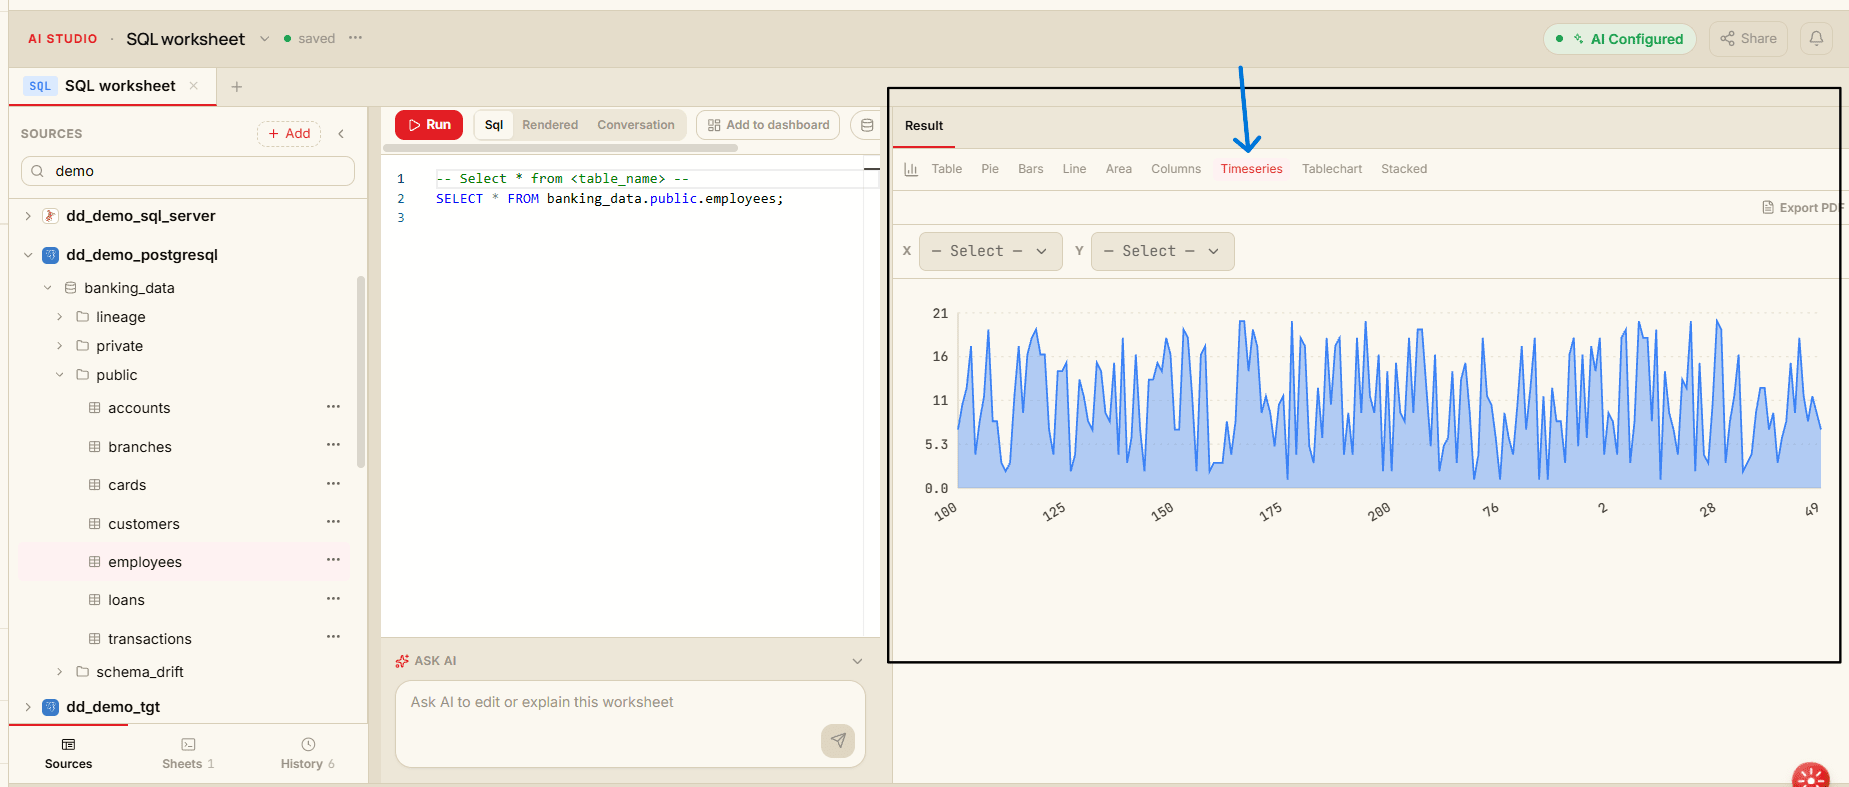
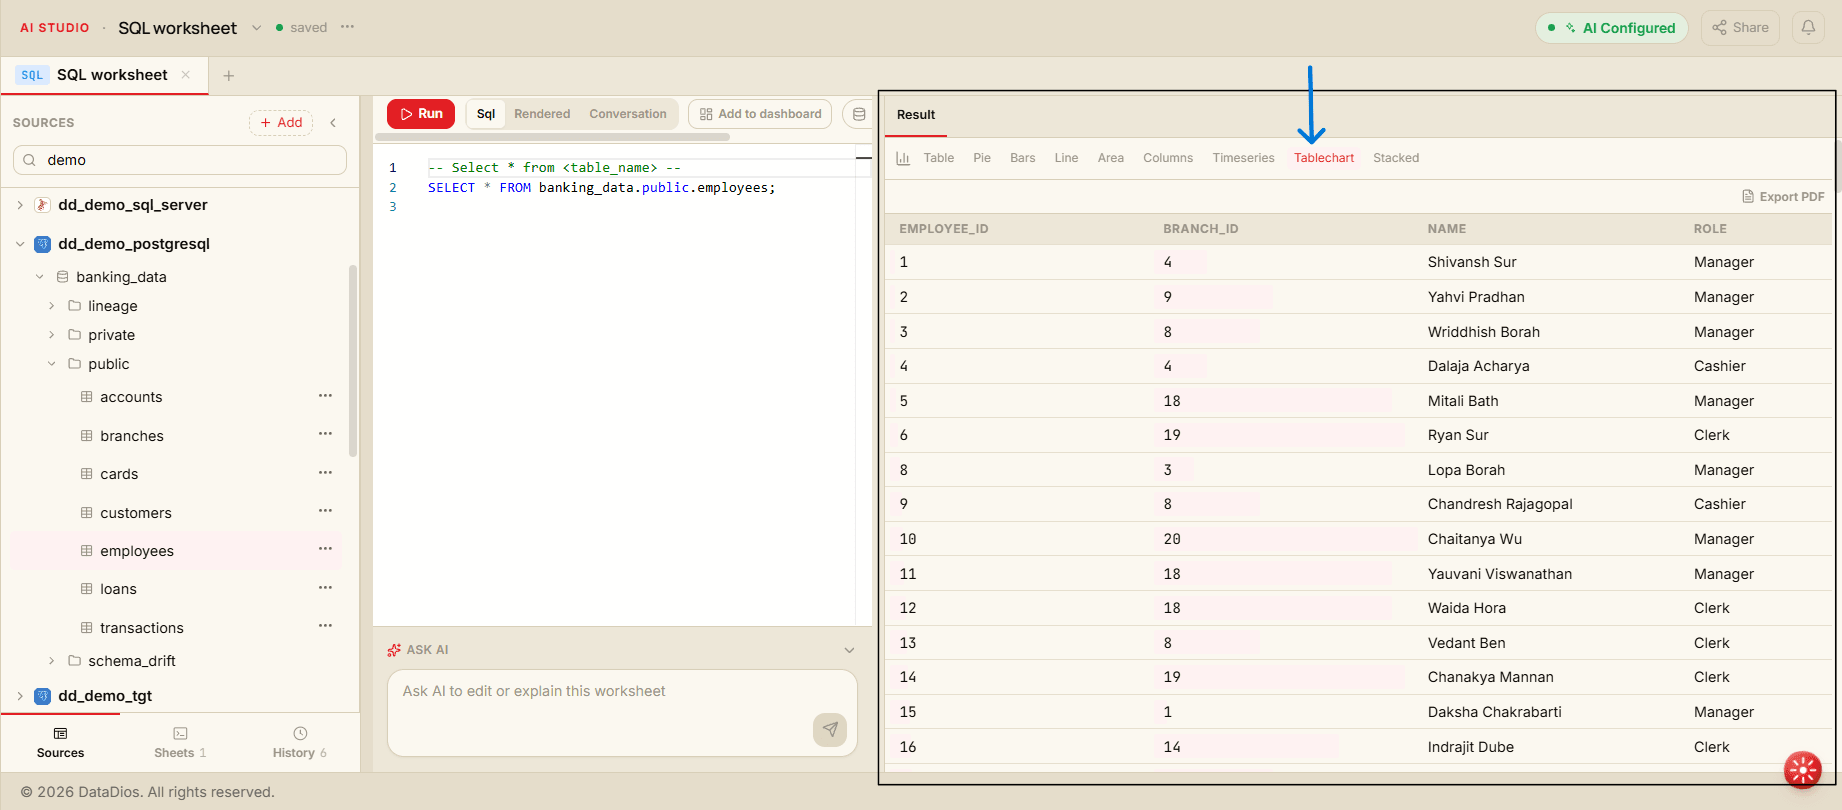
Table Chart View
- View results in a structured table format with enhanced visualization options.
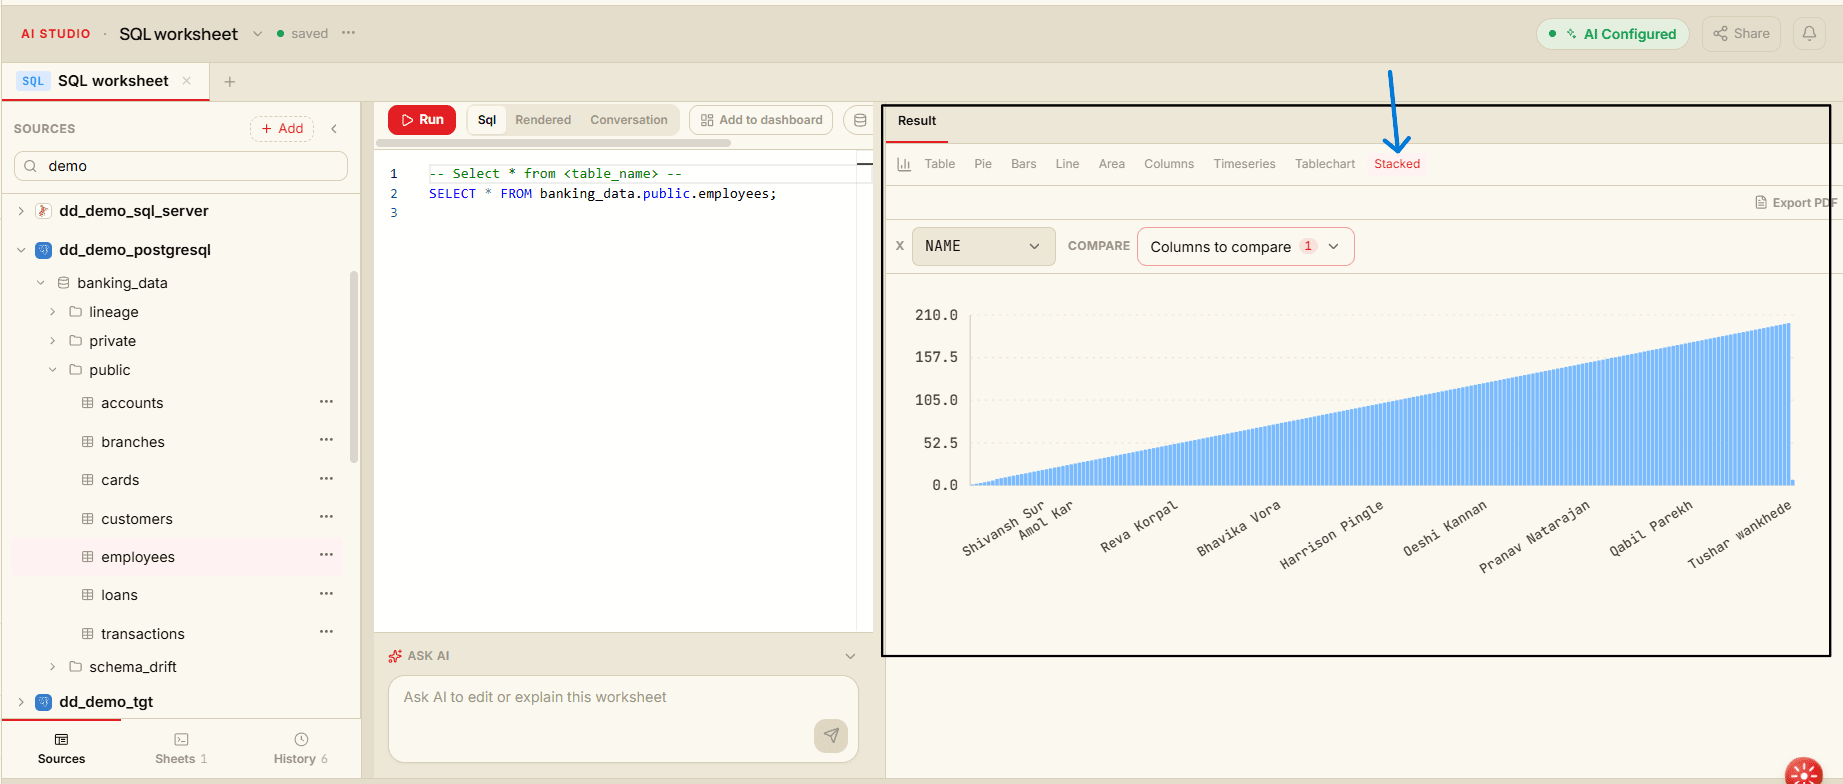
Stacked Columns Chart Visualization
- Visualize data distribution across rows with stacked columns.
- Each stacked column bar represents a single row, allowing comparison of multiple numeric columns in a stacked format.
Managing Worksheets
Worksheet Menu
Click the ... menu next to the worksheet name in the header to access:
- Rename — Change the worksheet name
- Star — Bookmark important worksheets for quick access
- Save as new — Create a copy of the current worksheet
- Share — Share the worksheet
- Delete worksheet — Permanently delete the worksheet and its history. You're asked to confirm first, because this can't be undone.
Save Status
Your work is saved automatically. The save indicator next to the worksheet name shows the current status:
- saved — All changes are persisted
- saving — Changes are being saved
- error — Save failed (retry available)
Where Worksheets Are Saved
Worksheets are saved to your DataDios account, not to your browser, so they're available from any browser or device you sign in on.
The Sheets tab lists your worksheets, most recently updated first. If you have a lot of worksheets, it loads them in batches: it shows how many are loaded out of the total (for example, 100 of 120), and Load more worksheets fetches the next batch. Searching the list only covers the worksheets loaded so far, so load more to search the rest.
Note: Earlier versions of AI Studio kept worksheets in the browser only. Those worksheets aren't carried over after the upgrade.
Best Practices
Query Writing
- Start Simple: Begin with basic queries and add complexity gradually
- Select a Source First: Always select a datasource from the Catalog Rail before running queries
- Use the AI: Create an AI Chat worksheet for syntax help and optimization
- Organize with Worksheets: Use separate worksheets for different tasks — name them descriptively
AI Assistant Usage
- Be Specific: Provide clear, detailed questions for better results
- Review Before Executing: Always validate AI-generated SQL before running
- Learn Patterns: Use the AI Chat worksheet to understand new SQL techniques
- Explore Schema: Browse the Catalog Rail or ask AI about table structures
Performance Optimization
- Monitor Execution Time: Check the row count and duration in the Result panel toolbar
- Use AI Suggestions: Request optimization recommendations via AI Chat
- Add to Dashboard: Pin frequently-used query results to a dashboard for quick access