Trino Engine
This section explains how to create, configure, and test a Trino Engine data source in DataDios.
Steps to Create and Test a Trino Data Source
Step 1: Create a Data Source
-
Navigate to the Data Sources tab in DataDios
-
Click + CREATE DS
-
From the list of available data source types, select Trino Engine

Step 2: Fill Connection Details
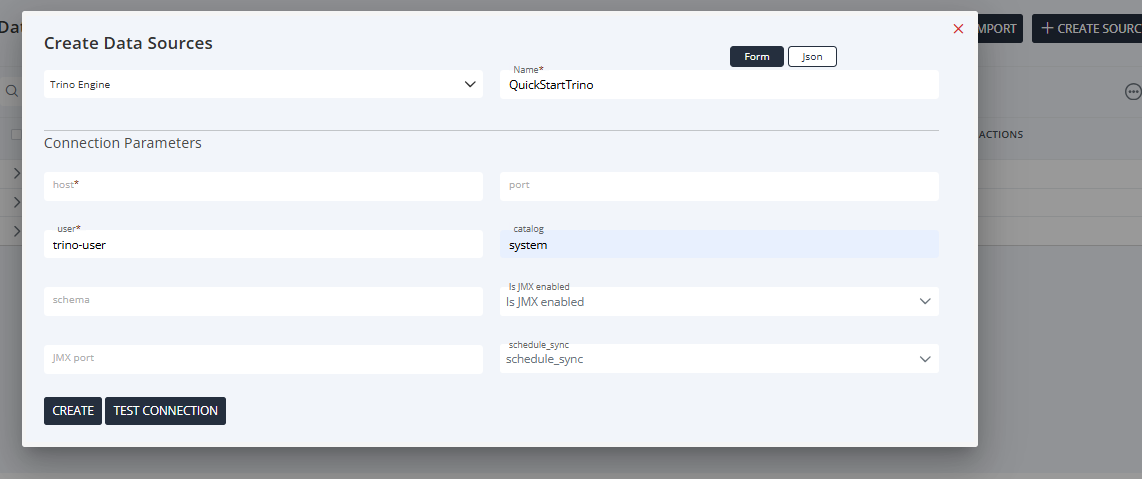
In the Connection Details form, provide the required parameters:
- Group: (Optional) Grouping for data sources
- Host: Trino host or IP address
- Port: Trino port (default:
8080) - User: Trino login username
- Catalog: Catalog to connect to (comma separated catalogs if multiple)
- Schema: Target schema (leave blank to use the default schema)
- Is JMX enabled: Choose Yes if JMX monitoring is enabled on the Trino server and will be used for workload extraction
- JMX Port: JMX port number (default:
9010) - Schedule Sync: Configure for metadata timeline synchronization (see Metadata Timeline)
- JSON Structure
      {
         "group": "",
         "host": "",
         "port": "8080",
         "service_type": "",
         "user": "trino-user",
         "catalog": "mysql,postgresql",
         "schema": "",
         "object_types": "",
         "password": "Admin@123"
      }
Step 3: Test Connection
-
After entering details, click Test Connection
-
Ensure the connection is validated successfully
Step 4: Save Data Source
- If the test succeeds, click Create to save the data source
- You will be redirected to the Datasource Listing Page, where the Trino data source will appear
Step 5: Explore Data Source Items
-
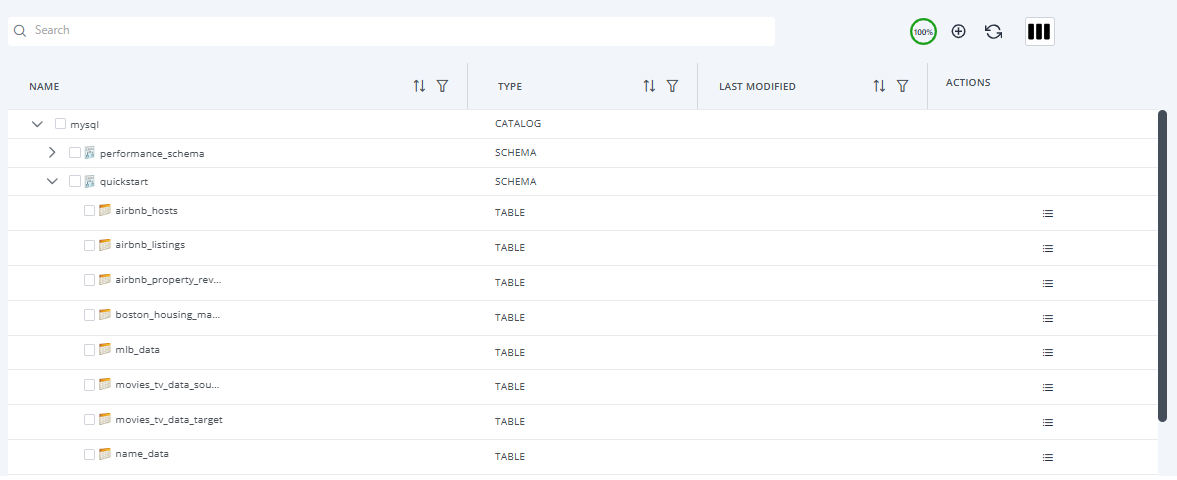
Expand the Trino data source to view all items (catalogs, tables, views, etc.)
-
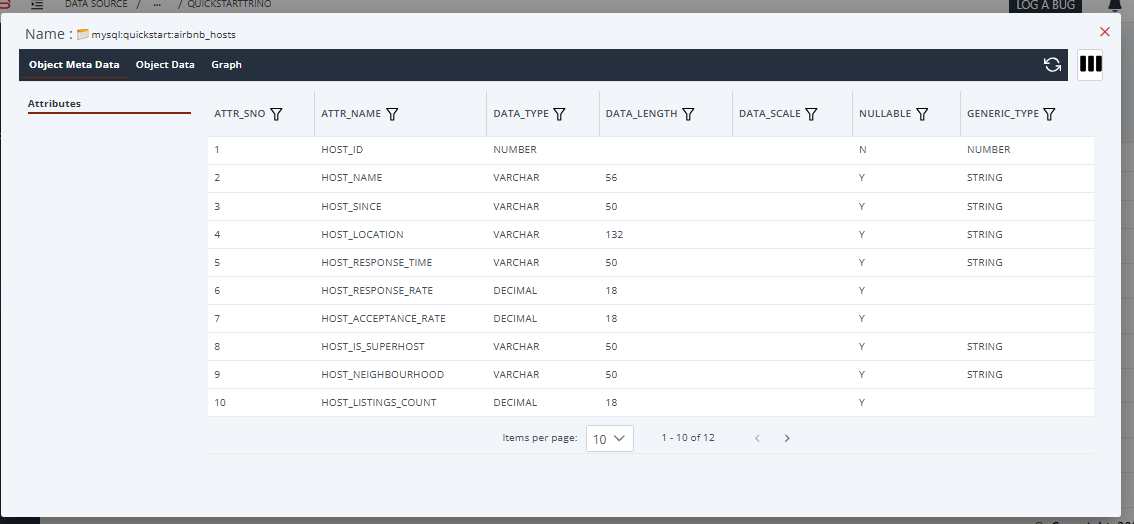
To view metadata about any item:
- Click the item name
- Click the three stacked lines icon to open the Object Metadata pop-up
-
You can also explore additional features in the Metadata Explorer:
-
Object Data
- View the actual data present in the selected resource (e.g., table rows or file details)

- View the actual data present in the selected resource (e.g., table rows or file details)
-
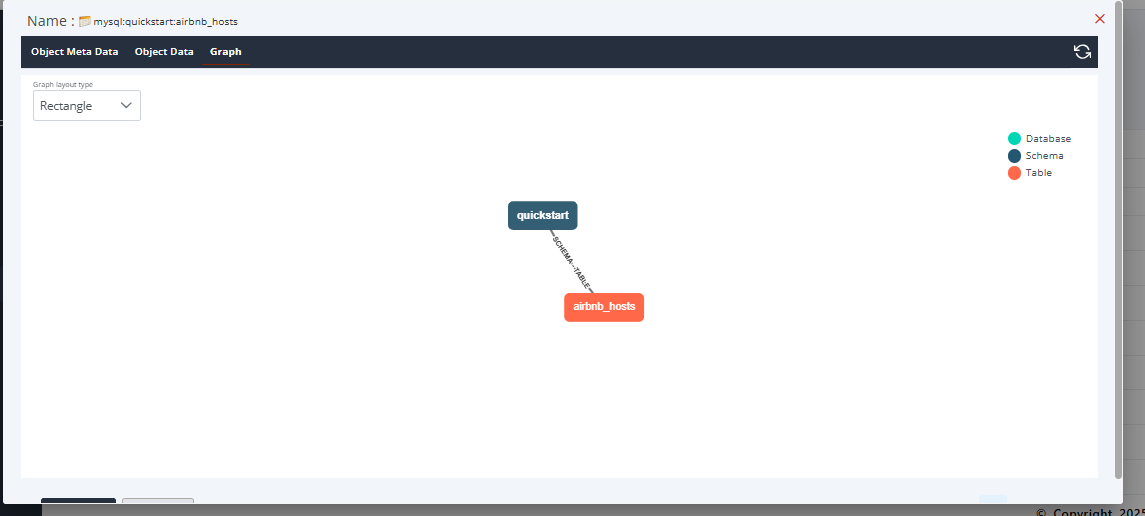
Graphs
- Visualize dependencies and relationships across schemas
- See how the item is connected to databases or other schema objects
-
-
You can also use below additional features
- Data Quality
- Define and monitor data quality rules for the selected database object.
- For detailed information, refer to the Data Quality documentation
- Metadata Timeline
- View changes over time for the selected database object
- For detailed information, refer to the Metadata Timeline
- AI Studio
- Explore and query data using natural language with AI assistance
- For detailed information, refer to the AI Studio documentation
- Data Quality
Best Practices
- Always Test Connection before saving to ensure configuration is correct
2Organize with Groups for easier management of multiple Trino data sources - Leverage Schedule Sync to keep metadata timelines updated