Datasources & Operations
This document explains how to create, update, test, clone, and delete datasources in DataDios.
Quick Start
Key Actions You Can Perform
- Create a New Datasource
- Test the Connection and Save the Datasource
- Update Datasource Details
- Clone a Datasource
- Delete a Datasource
- Import Datasource from JSON
Datasource Creation and Connection Parameters Validation
-
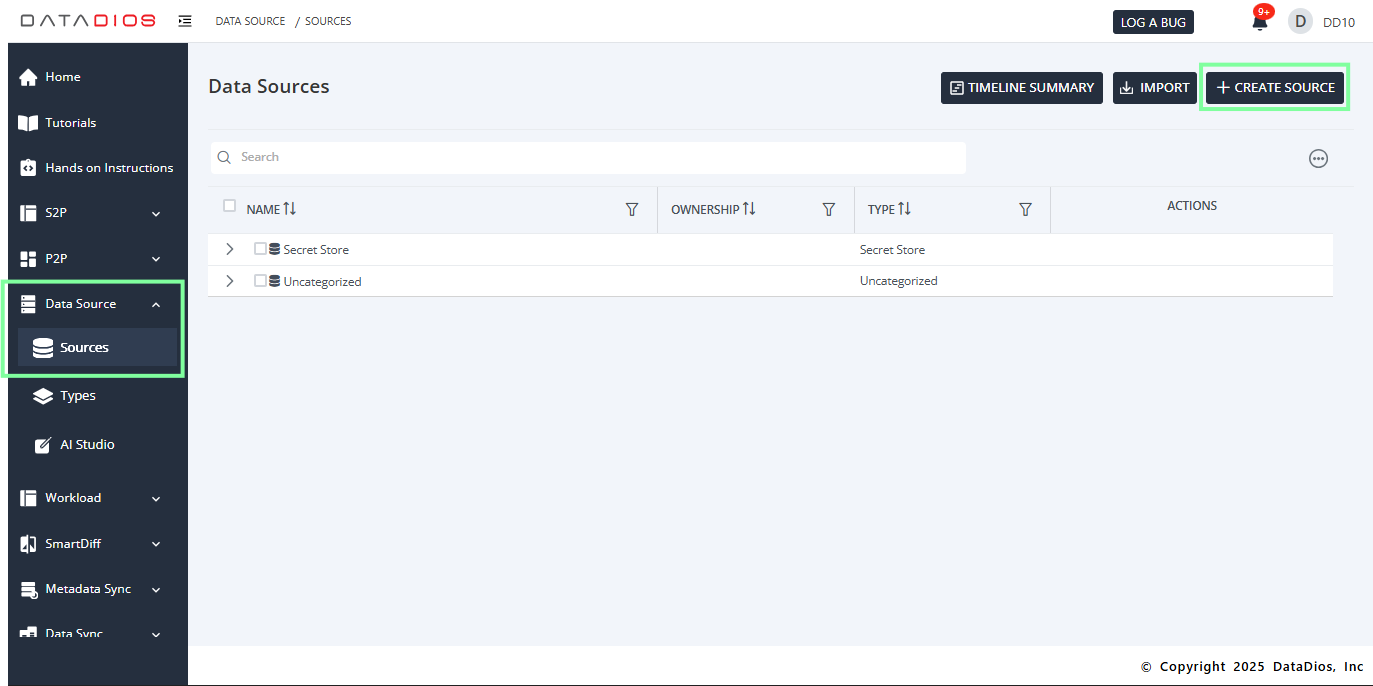
Navigate to the Datasources tab in DataDios and click on Create DS.
-
Choose your preferred Datasource Type from the list.
- Click on your datasource type for which you want to create, or search for it.
-
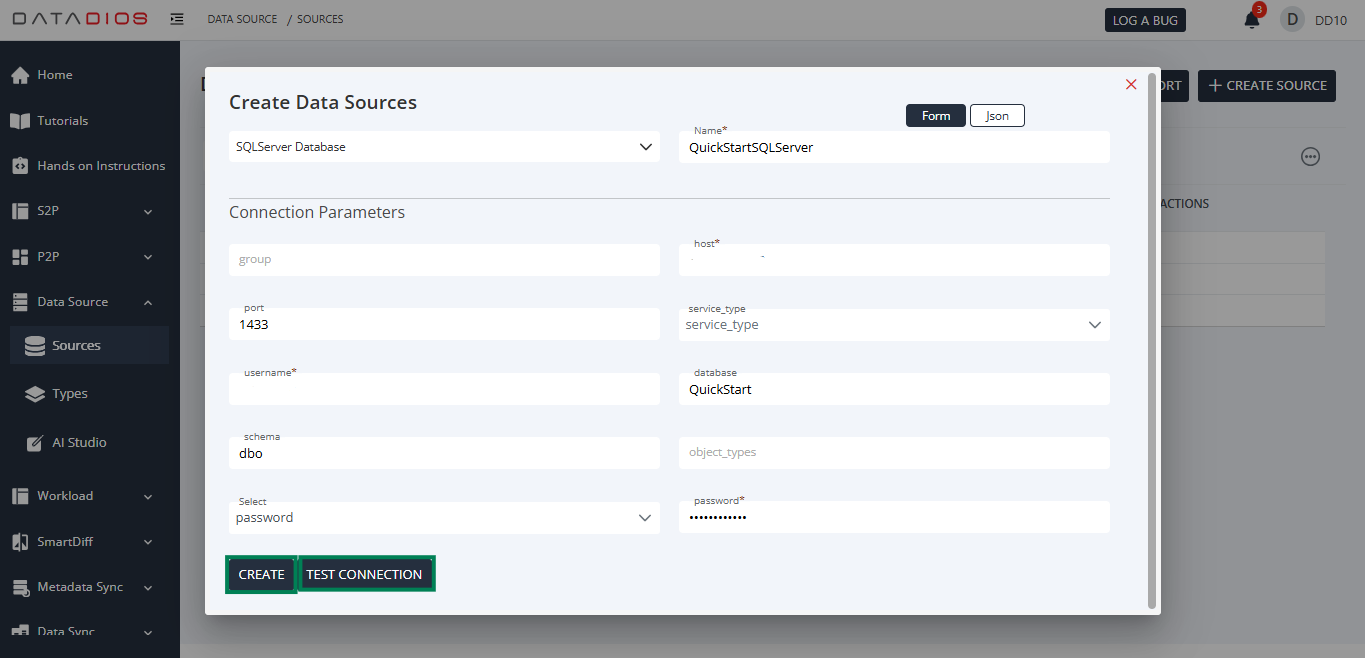
Fill in the Connection Details in the credentials form that appears.
-
Alternatively, you can provide the datasource details in JSON format.
-
JSON Format for Datasources
- Example below is for PostgreSQL. Please update credentials before using.
 {
    "host":"localhost",
    "port":"5432",
    "username":"postgres",
    "database":"quickstart",
    "schema":"",
    "object_types":"",
    "schedule_sync":"",
    "password":"your-password",
    "secret_name":""
 }
-
-
Once the details are entered, click Test to validate the connection.

-
After successful validation, click Create to save the datasource.
- This will redirect you to the datasource listing page, where your newly created datasource will appear.
Update Datasource Details
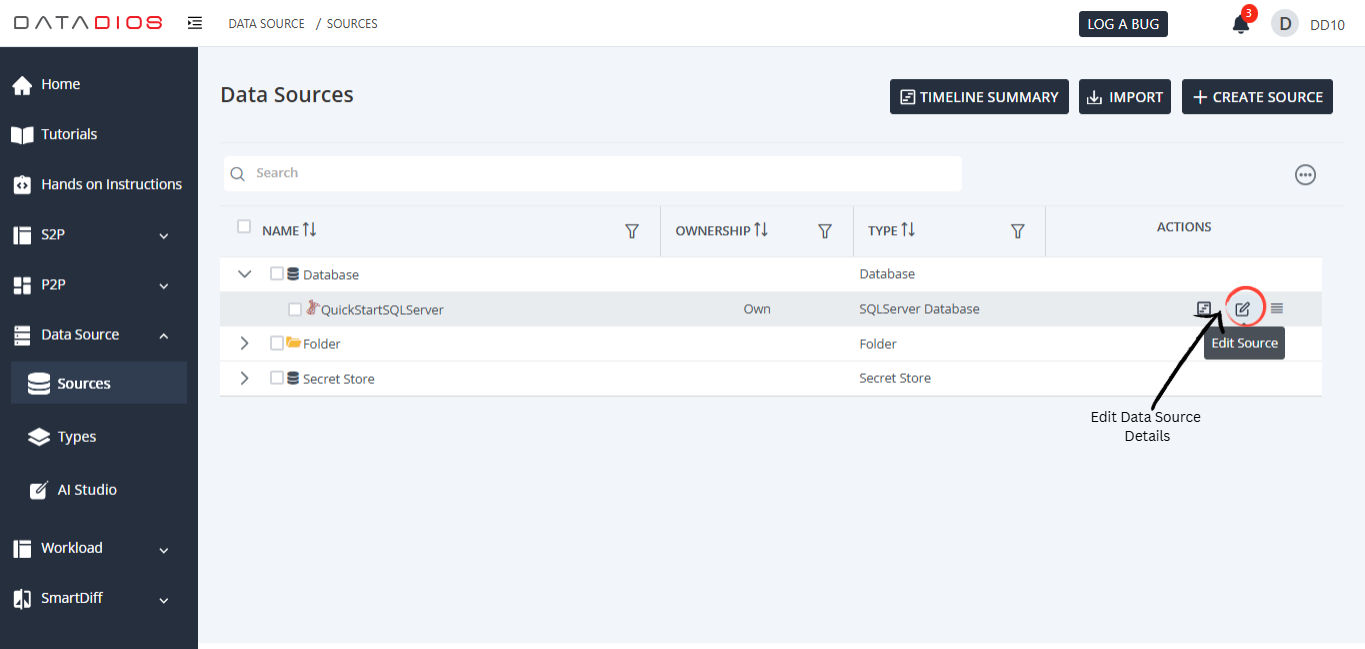
- Go to the Datasources tab and locate your datasource in the listing.
- Click on the Edit Icon to edit the datasource details.
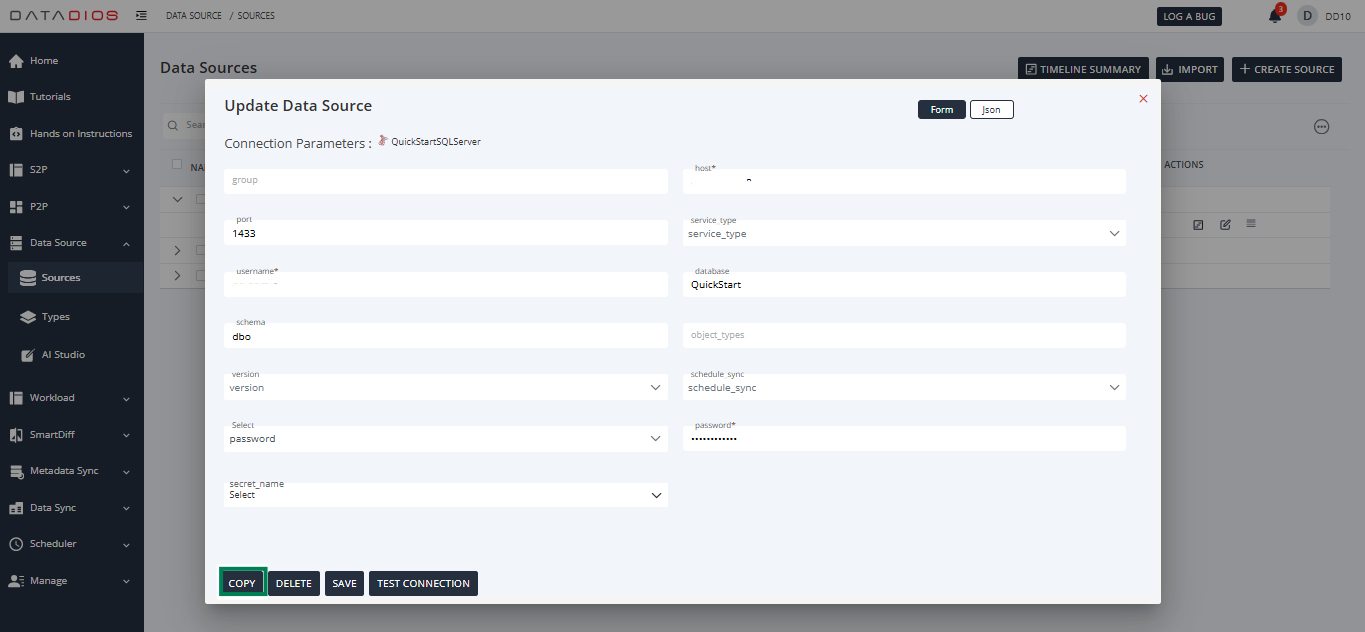
- Update the connection details (credentials, parameters, etc.) as needed.
- Validate the updated connection and click Save.
Import Datasource
- Datasource import is simply datasource creation when you are sure about the datasource credentials.
- This will create the datasource directly in DataDios.
- After import, you can validate your datasource by clicking on the edit panel and test-connection.
- To import a datasource, click on the import button and select your JSON file containing datasource details.
- You can import multiple datasources at the same time.
- JSON Structure
[
    {
       "Name": "Datasource_Name",
       "Type": "SQLServer Database",
       "Connection Parameters": [
             {
                "host": "host-address",
                "port": "1433",
                "username": "db-username",
                "password": "db-password",
                "database": "db-to-connect",
                "schema": "schema-to-connect",
                "object_types": "tables,views"
             }
       ]
    }
 ]
Clone a Datasource
- Go to the Datasources tab and locate your datasource in the listing.
- Click on the Edit Icon on the right side of the datasource name to edit the datasource details.
- To clone the datasource, click on Copy in the Datasource Edit Details Panel.
- Cloning follows the same process as datasource creation and will create a copy.
- Open the datasource details, adjust the parameters as required, and save.
- Ensure you update credentials and connection parameters correctly to avoid conflicts.
Delete a Datasource
There are two ways to delete a datasource in DataDios:
1. Delete from the Datasource List
-
Locate the datasource in the listing.
-
Click on the Options menu (top-right of the datasource card).
-
Select Delete.
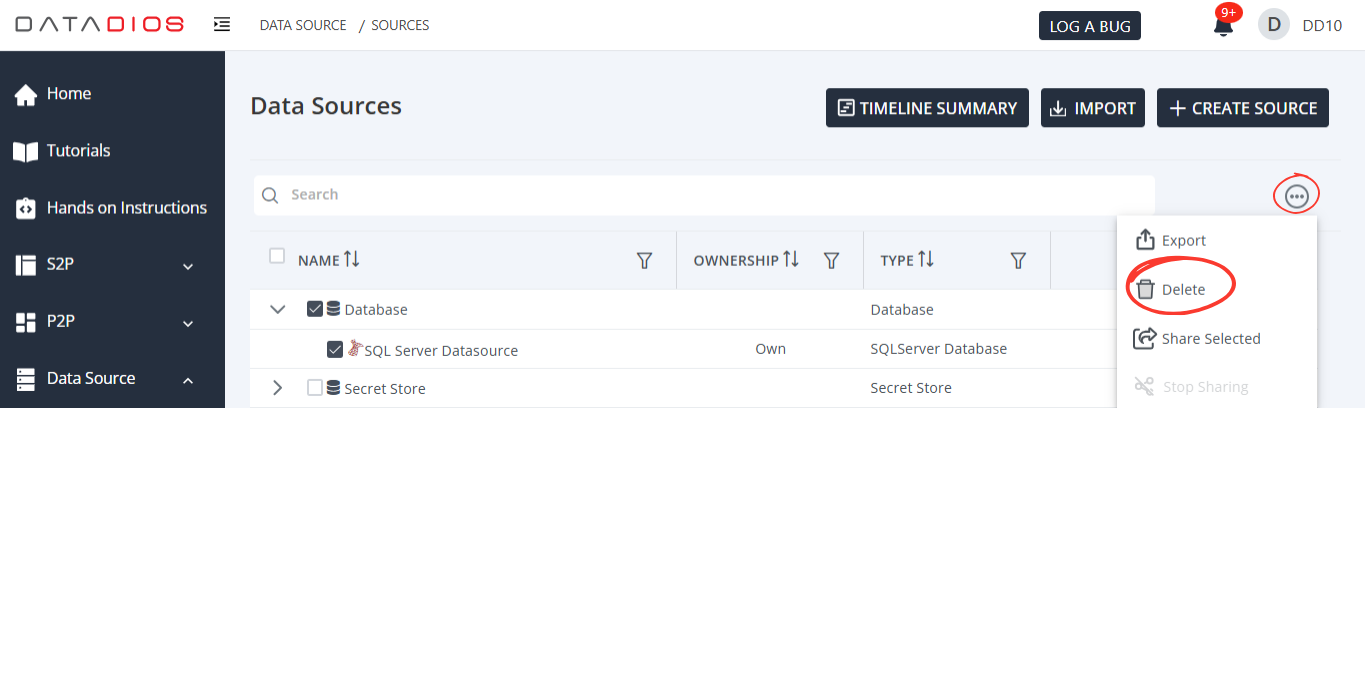
-
Choose an appropriate deletion action:
- Safe Delete
- Removes all data associated with the selected datasource.
- Requires you to confirm the action by selecting the checkbox.
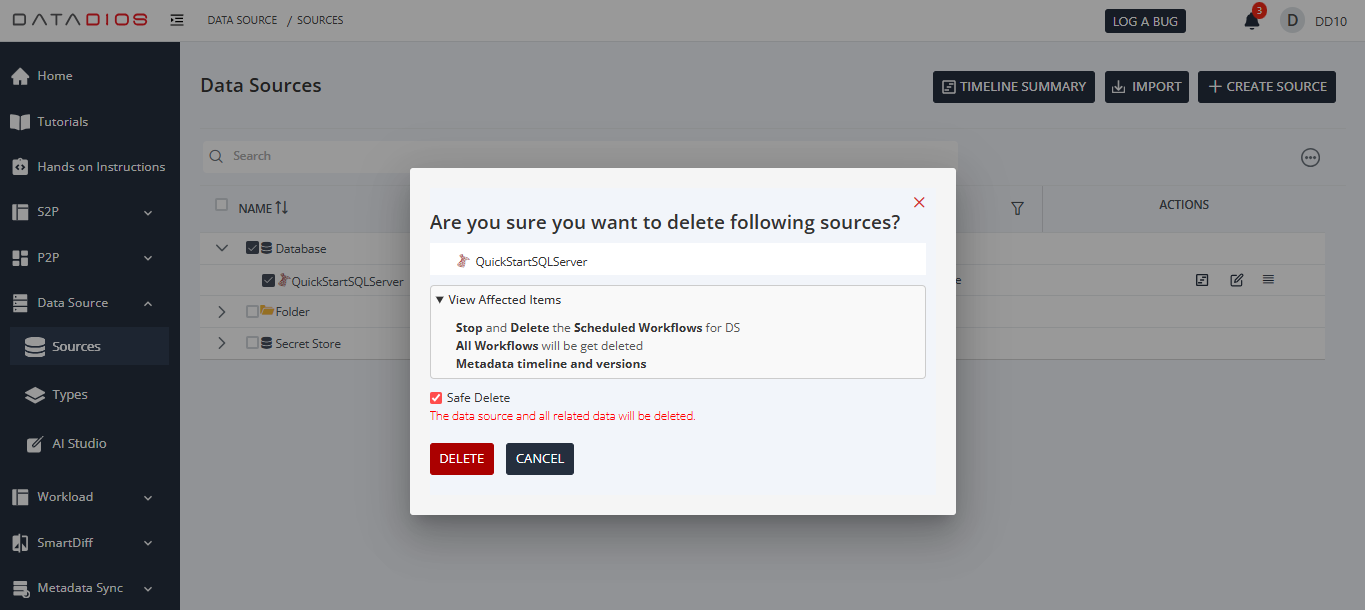
- Delete Operation
- Removes only dependent data related to the datasource.
- Useful if you want to retain partial or linked information.
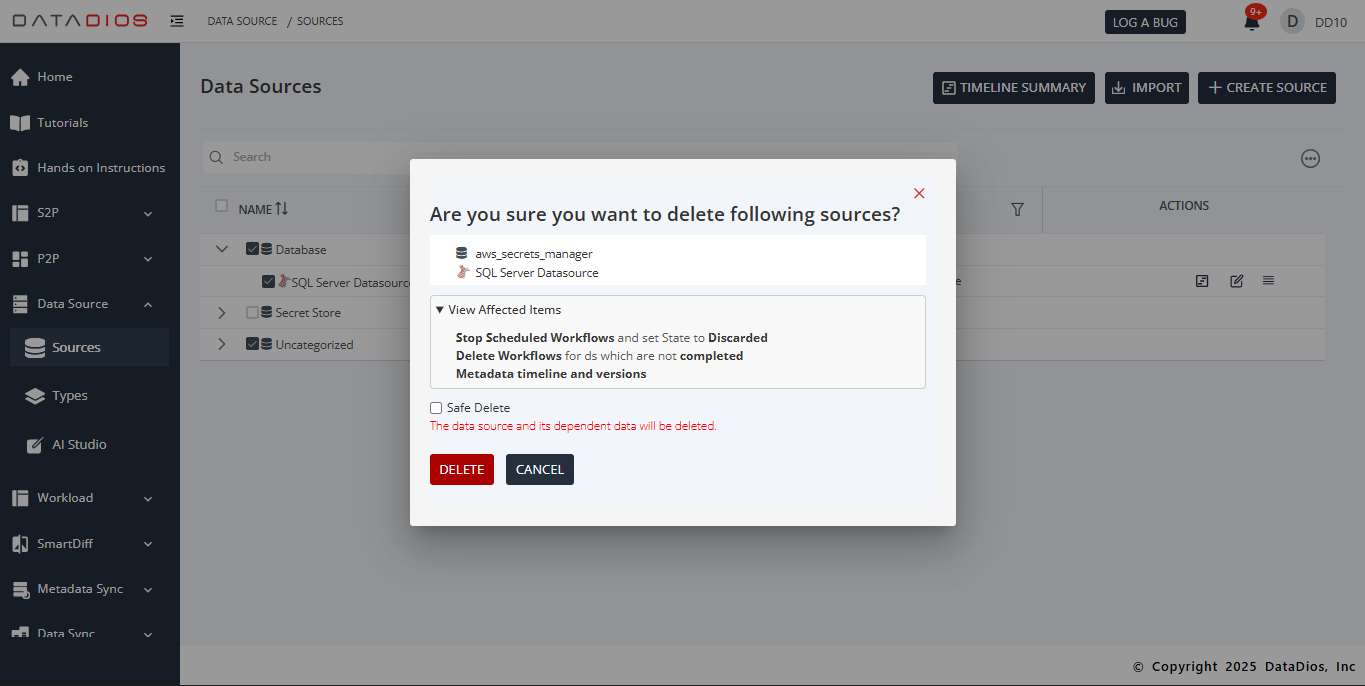
- Click on Delete Operation and this will delete the datasource and trigger an alert indicating that the datasource and its data have been deleted.
- Safe Delete
2. Delete from the Edit Datasource Details Panel
- Open the datasource details form.
- Use the Delete option available in the panel.
- This will also follow the same operations.
Alert After Datasource Deletion

Explore Datasources
For detailed steps on creating and testing specific datasources, check out the following: