PostgreSQL
This section explains how to create, configure, and test a PostgreSQL data source in DataDios.
Steps to Create and Test a PostgreSQL Data Source
Step 1: Create a Data Source
-
Navigate to Data Explorer from the left navigation menu.
-
Click + Add connection in the top-right corner. The Create data source dialog opens.
-
Under Identity, enter a Name for the datasource and select PostgreSQL Database from the searchable Type dropdown.
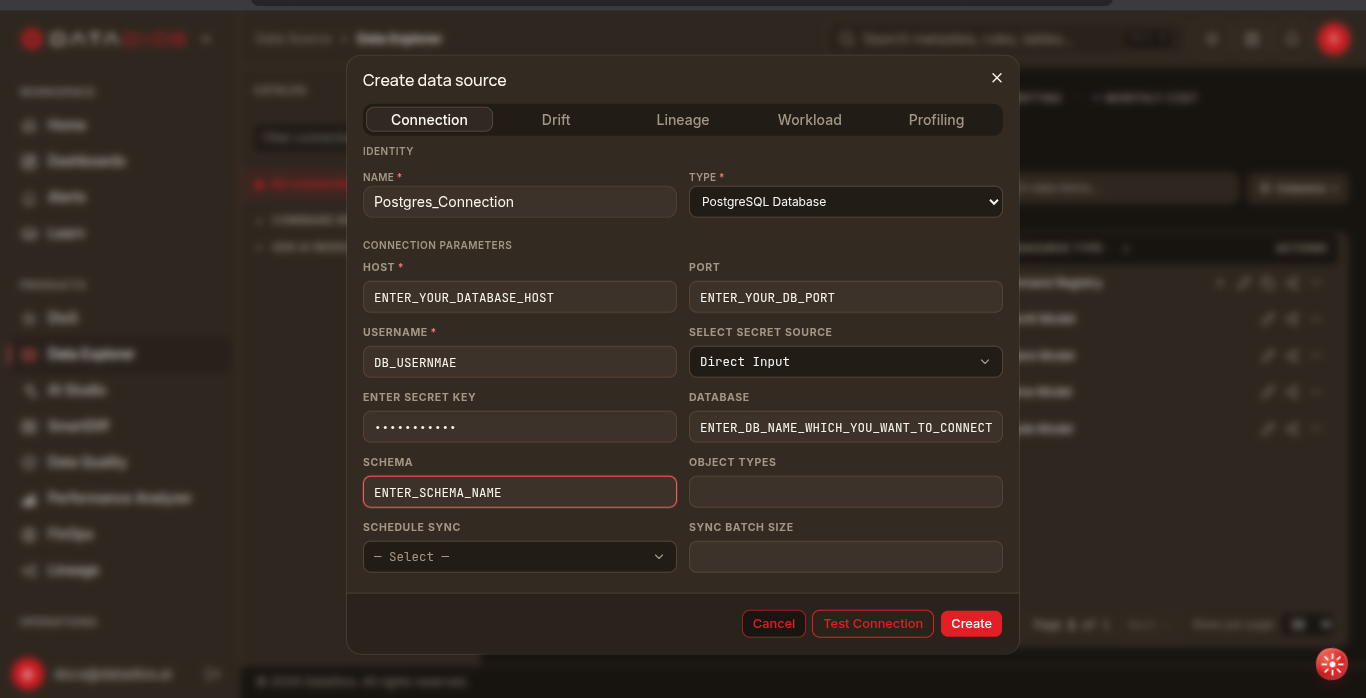 note
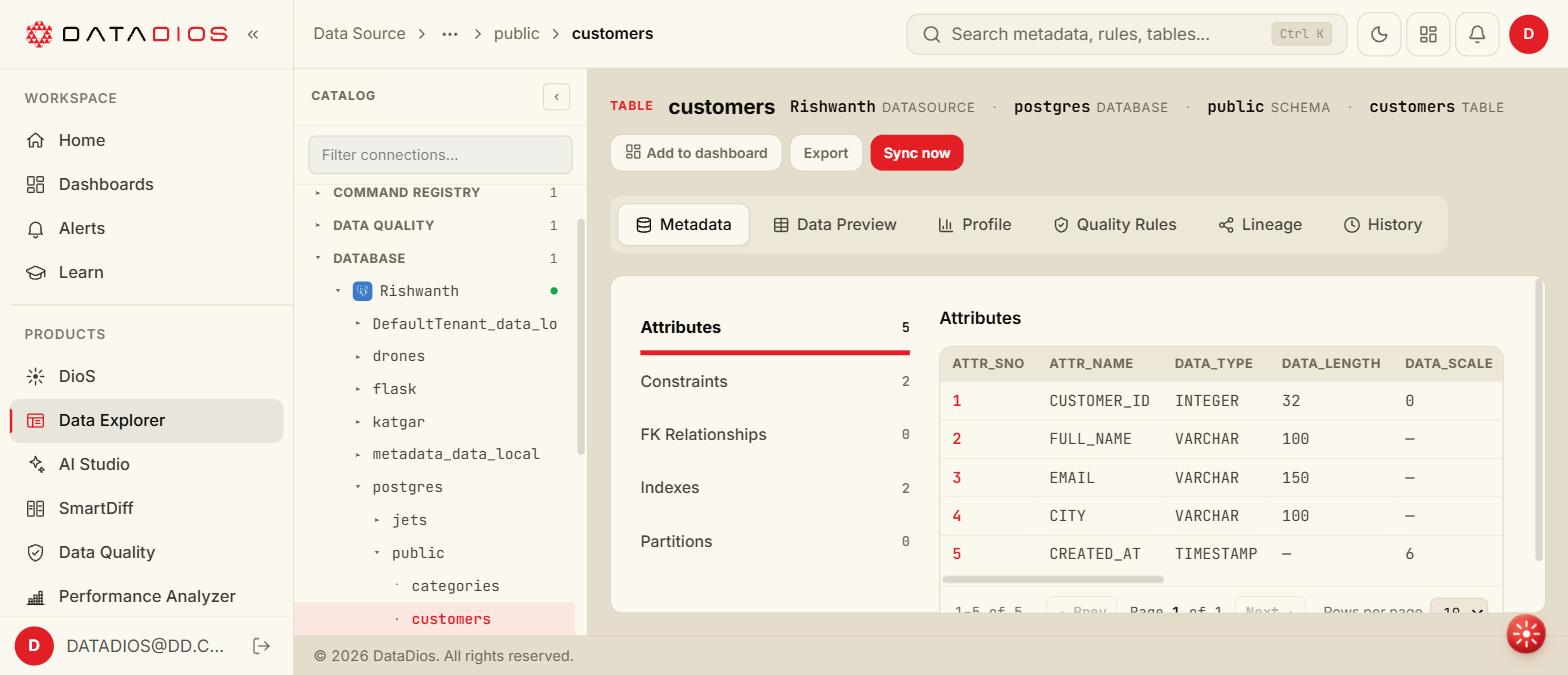
noteThe tab strip in this screenshot predates 2026-09-09 and still shows a Lineage tab. That tab was removed. Recapture is tracked in dd-docs#208.
Step 2: Fill Connection Details
In the Connection Parameters section, provide:
- Host: PostgreSQL host or IP address
- Port: PostgreSQL port (default:
5432) - Username: PostgreSQL login username
- Select Secret Source: choose Direct Input to type the password here, or select a configured secret store
- Enter Secret Key: the password for the account (shown only when Secret Source is Direct Input)
- Database: database to connect to
- Schema: target schema (leave blank to use the default schema)
- Object Types: choose whether to fetch
tables,views, or both - Schedule Sync: configure for metadata timeline synchronization (see Metadata Timeline)
- Sync Batch Size: optionally control how much metadata is fetched per batch
The dialog can also show Drift, Workload, and Profiling tabs for optional capabilities — these are optional and can be turned on later from Edit:
- Drift — toggle Enable drift tracking to monitor the source for schema changes.
- Workload — toggle Enable workload analysis and pick from PostgreSQL-specific workflows (PG Table Storage Usage, PG Database Storage Usage, PG Query Workload, and more).
- Profiling — toggle Enable data profiling to collect column/table-level facts for quality rules and search.
Step 3: Test Connection
Click Test Connection to validate the credentials before saving.
Step 4: Save Data Source
If the test succeeds, click Create. You'll land back on the Sources list with the new PostgreSQL connection visible.
Step 5: Explore Data Source Items
Click the connection's name to drill down through its hierarchy — connection → database → schema → table — with tabs that change at each level:
| Level | Tabs |
|---|---|
| Connection | Sources · Lineage · Schema Drift · Data Quality |
| Database | Sources · Lineage · Schema Drift · Data Quality · Queries |
| Schema | Sources · Lineage · Schema Drift · Data Quality |
| Table | Metadata · Data Preview · Profile · Quality Rules · Lineage · History |
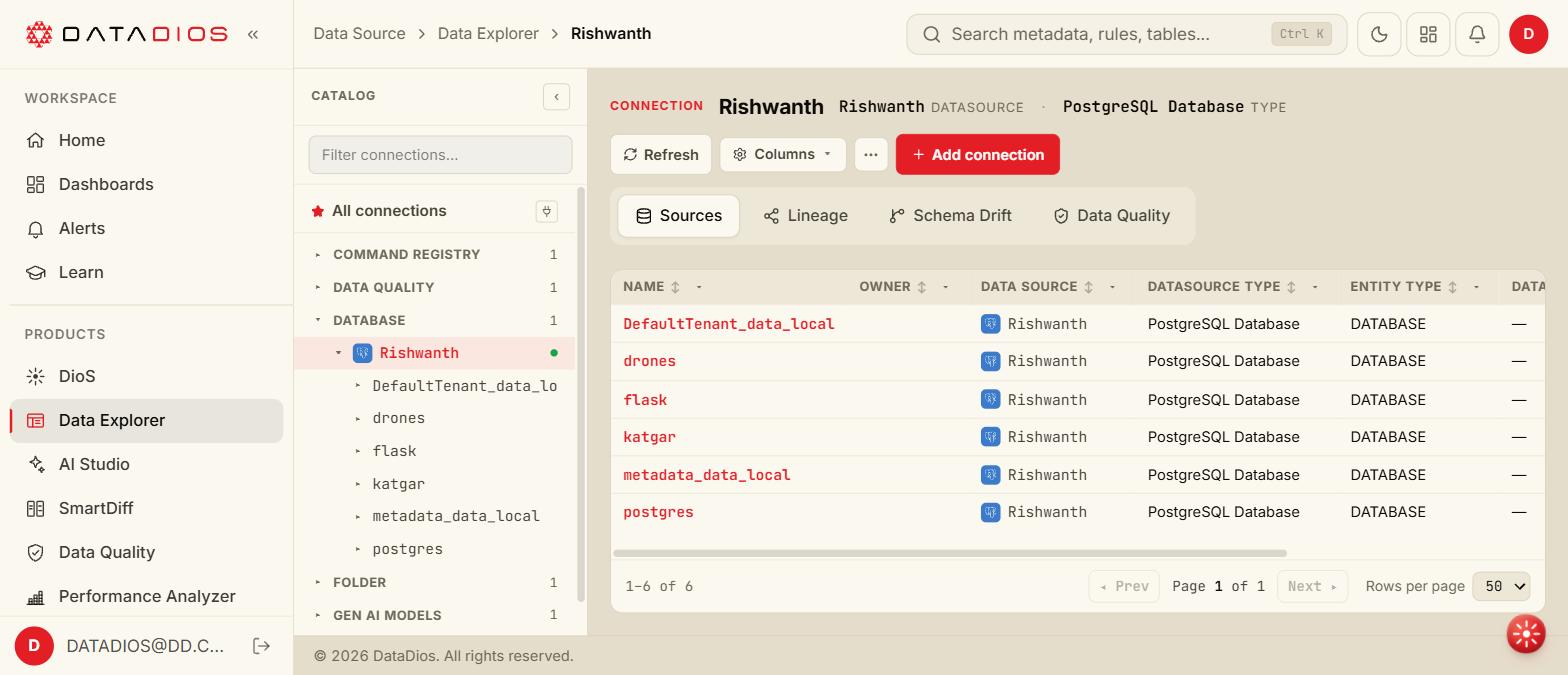
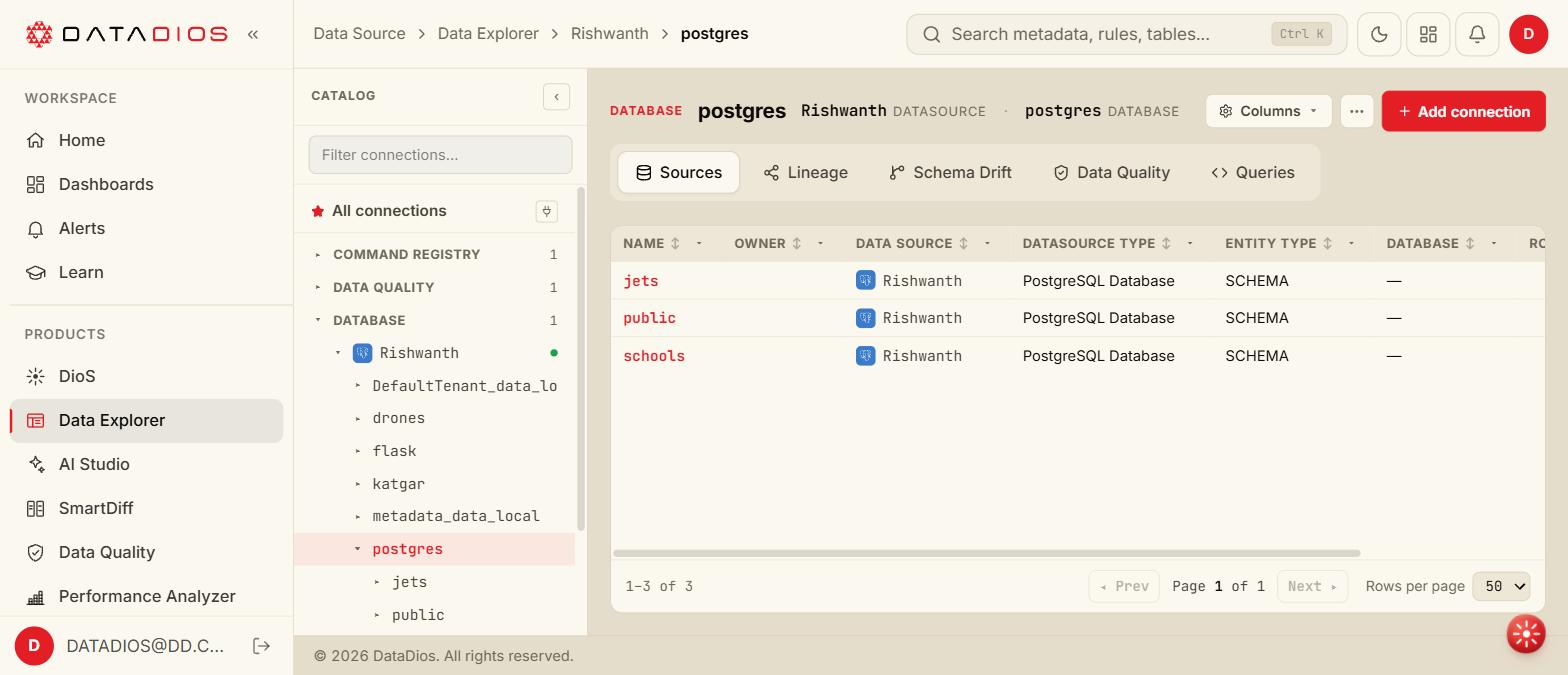
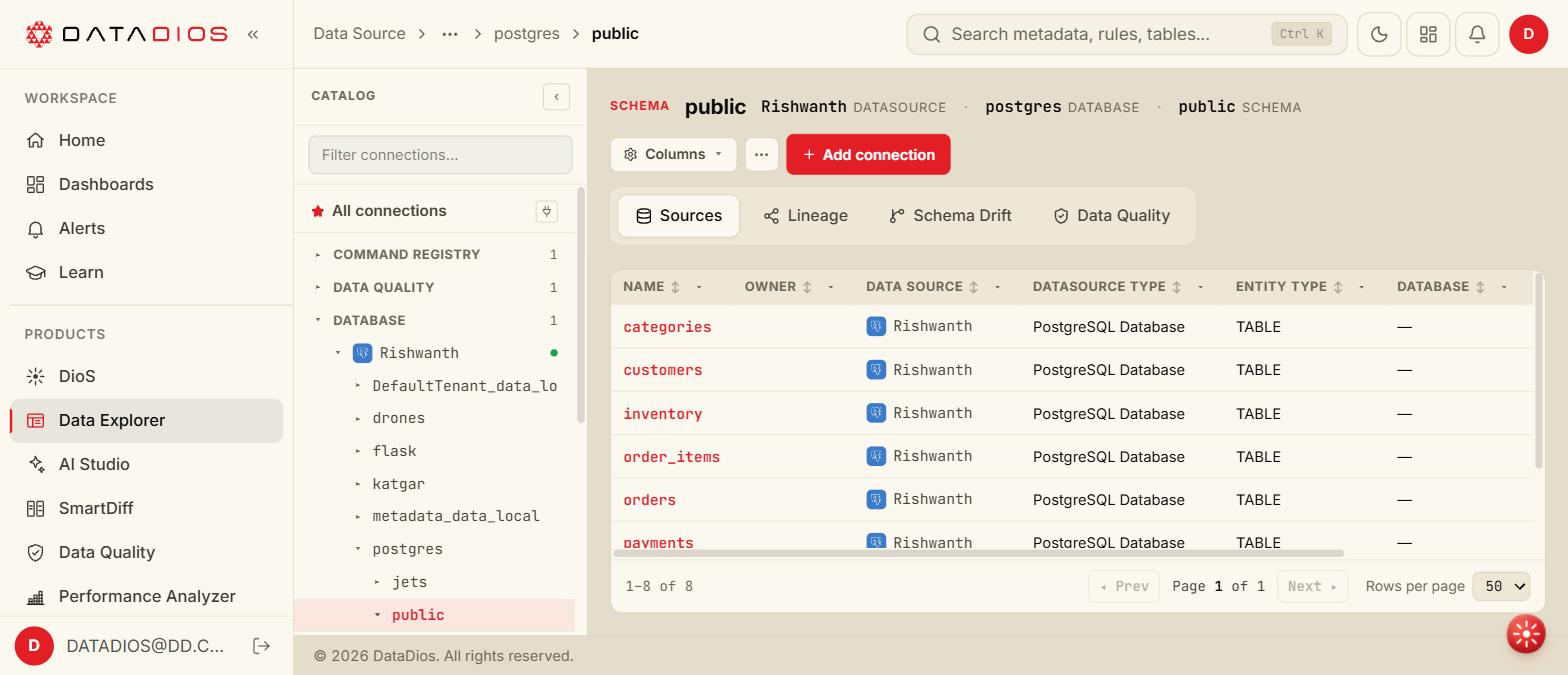
Open a table to view its Metadata tab — Attributes, Constraints, FK Relationships, Indexes, and Partitions. The Attributes table lists ATTR_SNO, ATTR_NAME, DATA_TYPE, DATA_LENGTH, DATA_SCALE, NULLABLE, and GENERIC_TYPE.
Other useful tabs on the same table:
-
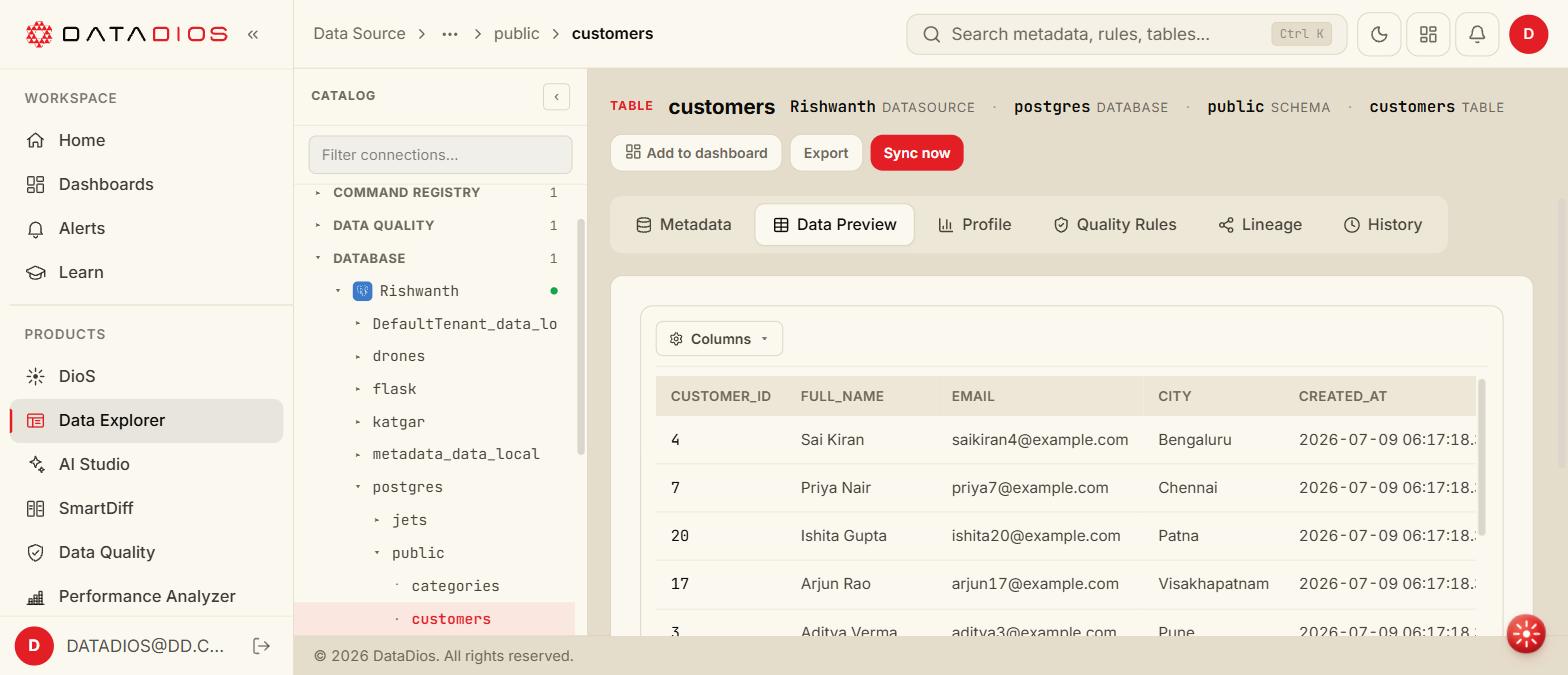
Data Preview — a row-level data grid of the table's actual content.
-
Profile — column- and table-level profiling facts, populated when Enable data profiling is on for the connection.
-
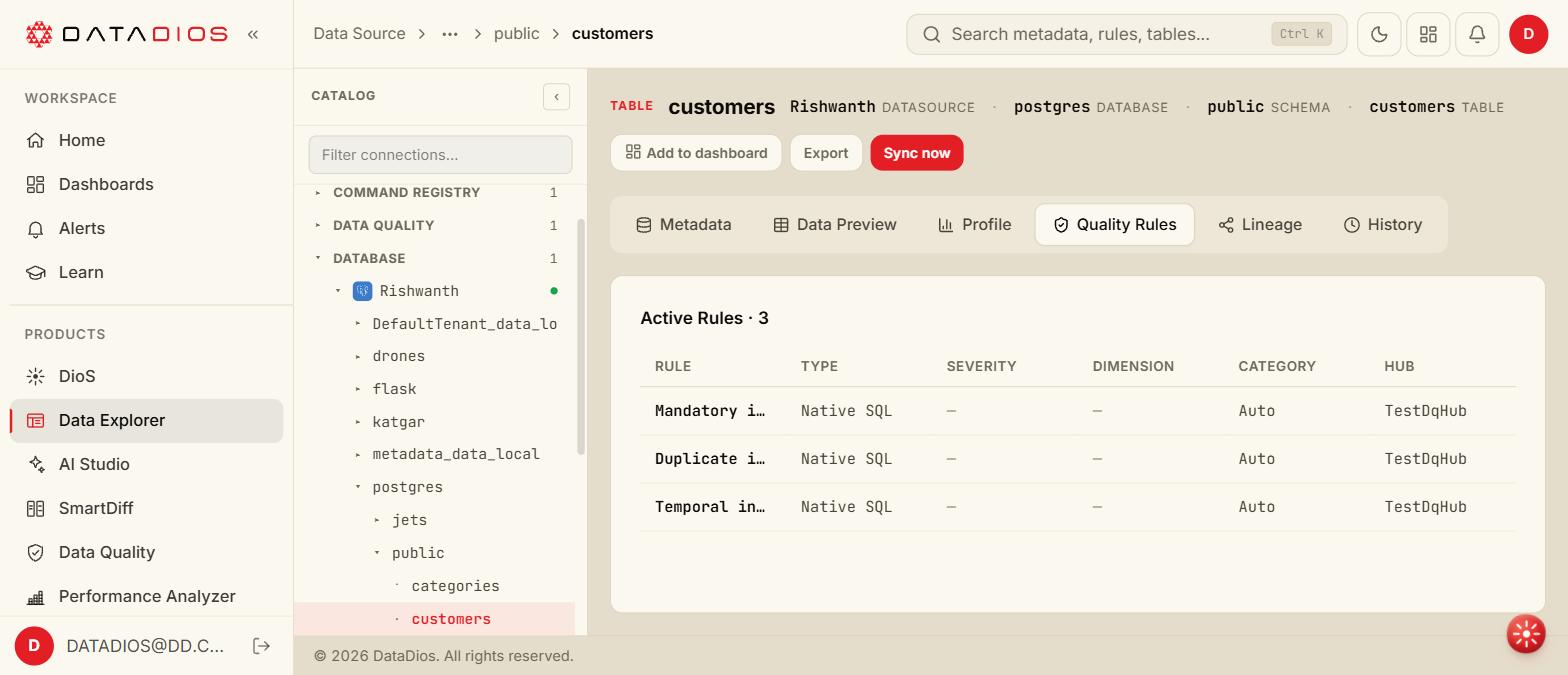
Quality Rules — the Active Rules configured for this table (Rule, Type, Severity, Dimension, Category, Hub). For detailed information, refer to the Data Quality documentation.
Best Practices
- Use Secret Store for passwords to avoid hardcoding credentials
- Always Test Connection before saving to ensure configuration is correct
- Enable only what you need — Drift, Workload, and Profiling are optional and can be turned on later from Edit if you don't need them at creation time
- Leverage Schedule Sync to keep metadata timelines updated
For more details on configuring PostgreSQL with metadata sync, see the Metadata Timeline.