Snowflake
This section explains how to create, configure, and test a Snowflake data source in DataDios, including the different ways you can authenticate.
Before you connect, see Snowflake Permissions for the exact grants the Snowflake user needs — and the ones it deliberately does not.
Snowflake workload extraction now checks in hourly, and two unused metric groups were removed. See the v1.9.0 release notes.
Steps to Create and Test a Snowflake Data Source
Step 1: Create a Data Source
- Navigate to Data Explorer from the left navigation menu.
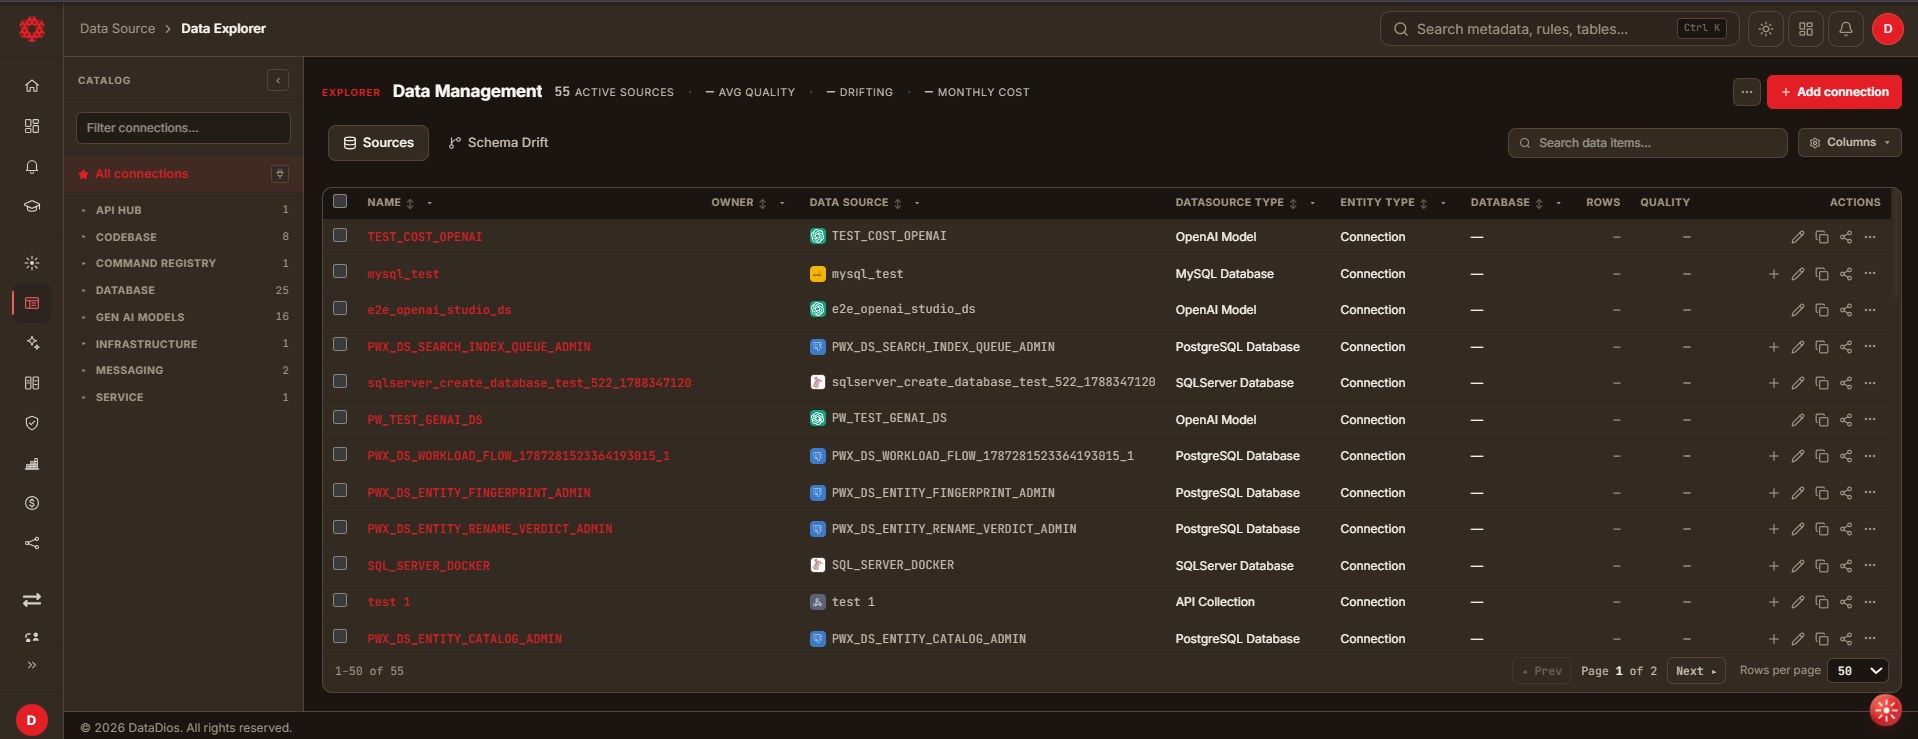
- Click + Add connection in the top-right corner. The Create data source dialog opens.
- Under Identity, enter a Name for the connection and select Snowflake Database from the searchable Type dropdown — it is listed under the Database group.
Step 2: Choose an Authentication Method
Snowflake supports three ways to connect. Pick one from the Auth Type dropdown — the form rebuilds itself to show only the fields that method needs.
In all three methods the secret is entered through the Select Secret Source / Password pair: choose Direct Input to type the value into Password, or From Secret Store to reference a configured secret store. What that password means changes with the auth type.
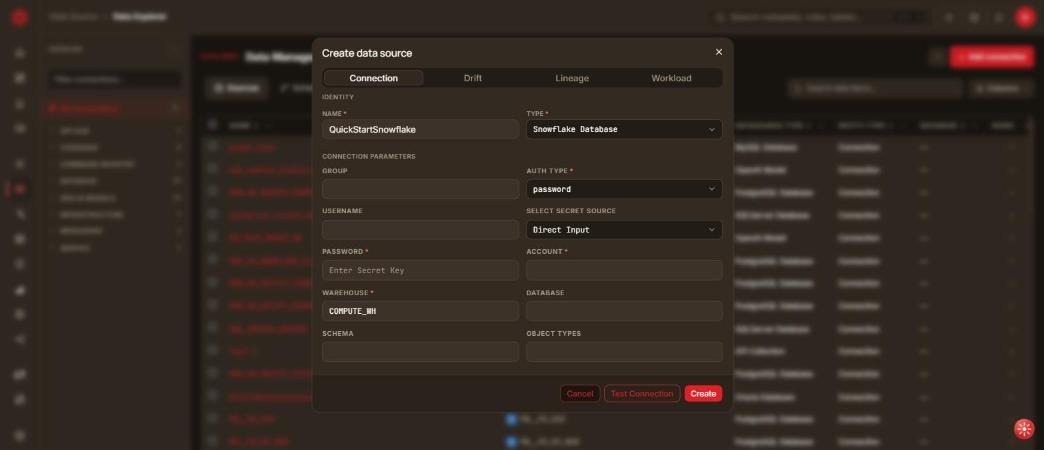
password
The default. Sign in with a standard Snowflake user and password.
- Username: Snowflake login name
- Password: the password for that user
Best for quick setup and manual exploration.
azure_oauth
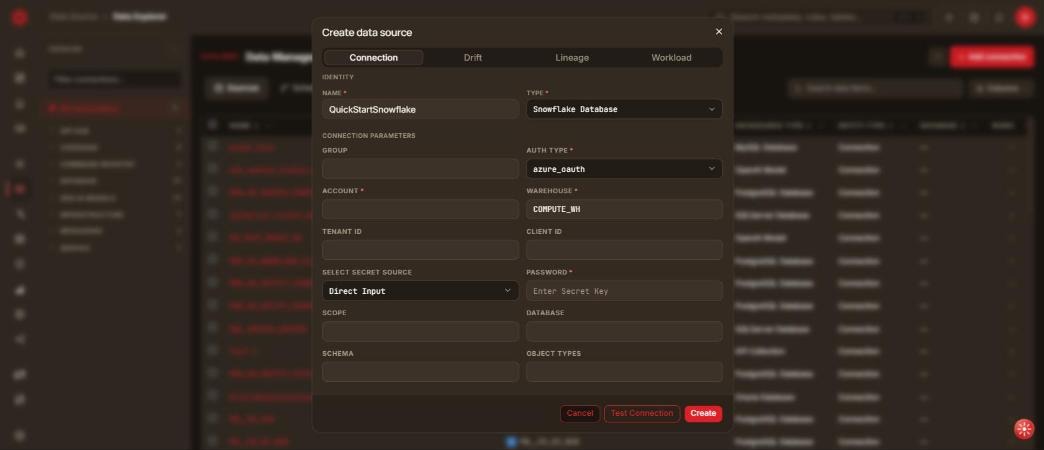
Authenticate through an Azure AD (Entra ID) application instead of a Snowflake password. DataDios requests a token from Azure and uses it to open the Snowflake session, refreshing it automatically when it expires.
- Tenant ID: Azure directory (tenant) ID
- Client ID: application (client) ID of the registered Azure app
- Password: the client secret generated for that app
- Scope: OAuth scope configured for the Snowflake integration
No Snowflake username is required with this method — the Username field is not shown.
key_pair
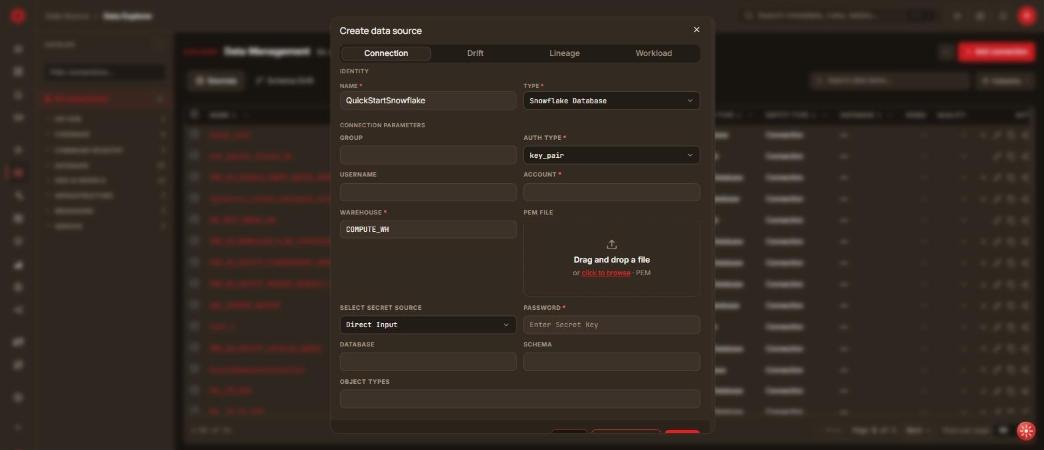
Authenticate with an RSA private key instead of a password — the recommended option for automated and scheduled workloads.
- Username: Snowflake login name the key is registered against
- PEM File: drag and drop your private key file onto the upload area, or click click to browse. The control accepts PEM files.
- Password: the passphrase protecting the private key
The matching public key must already be assigned to the Snowflake user (ALTER USER … SET RSA_PUBLIC_KEY = …) before testing the connection.
Step 3: Fill Common Connection Details
These fields apply to every authentication method:
- Group: (Optional) grouping label for connections
- Account: Snowflake account identifier (e.g.,
xy12345orxy12345.us-east-1) (required) - Warehouse: virtual warehouse used to run queries — prefilled with
COMPUTE_WH(required) - Database: (Optional) restrict sync to specific databases; accepts a comma-separated list, or
*for all - Schema: (Optional) restrict sync to specific schemas; accepts a comma-separated list, or
*for all - Object Types: (Optional) limit which object types are fetched (e.g.,
BASE TABLE,VIEW,MATERIALIZED VIEW)
The dialog also carries Drift, Lineage and Workload tabs. These are optional and can be turned on later from Edit:
- Drift — toggle Enable drift tracking to record schema changes (new columns, type changes, dropped tables) in the drift timeline.
- Lineage — toggle Build lineage after creating to trace data flow across pipelines and jobs.
- Workload — toggle Enable workload analysis (and optionally Enable insight extraction), then pick from the Snowflake workflows: SF Table Storage Usage, SF Daily Storage, SF DB Storage Usage, SF Warehouse Usage, SF Query Workload, SF Cost Details and SF Query Workload v2.
Snowflake has no Profiling tab.
Step 4: Test Connection
Click Test Connection to validate the account, warehouse and credentials before saving.
If the test fails because of the warehouse, run SHOW WAREHOUSES; in the Snowflake UI to confirm the name is correct and that your user can access it.
Step 5: Save Data Source
If the test succeeds, click Create. You land back on the Sources list, and the new Snowflake connection appears under the Database category in the left Catalog panel.
To change it later, click the Edit connection (pencil) icon on its row and save with Save instead of Create.
Step 6: Explore Data Source Items
Click the connection's name to drill down into it. Every level of the hierarchy opens a Sources listing of the objects beneath it, alongside the Lineage, Schema Drift and Data Quality tabs. Opening a table lands on its Metadata tab, with Data Preview, Profile, Quality Rules, Lineage and History beside it — the same explorer shell used by every other connection type (see PostgreSQL for a worked example of the drill-down).
Connection Parameters
| Field | Shown for | Required | Default | Description |
|---|---|---|---|---|
| Auth Type | all | Yes | password | Authentication method: password, azure_oauth or key_pair |
| Account | all | Yes | — | Snowflake account identifier |
| Warehouse | all | Yes | COMPUTE_WH | Virtual warehouse used to run queries |
| Group | all | No | — | Grouping label for connections |
| Database | all | No | — | Comma-separated database filter (* for all) |
| Schema | all | No | — | Comma-separated schema filter (* for all) |
| Object Types | all | No | — | Comma-separated object type filter (* for all) |
| Select Secret Source | all | — | Direct Input | Where the secret comes from: typed here, or a configured secret store |
| Password | all | Yes | — | User password (password), Azure client secret (azure_oauth), or private-key passphrase (key_pair) |
| Username | password, key_pair | Yes | — | Snowflake login name |
| Tenant ID | azure_oauth | Yes | — | Azure directory (tenant) ID |
| Client ID | azure_oauth | Yes | — | Azure application (client) ID |
| Scope | azure_oauth | Yes | — | OAuth scope for the Snowflake integration |
| PEM File | key_pair | Yes | — | Private key file upload (PEM) |
DataDios connects using the Snowflake user's default role, and the built-in SNOWFLAKE database and all INFORMATION_SCHEMA schemas are excluded from listings.
Best Practices
- Prefer
key_pairorazure_oauthover password authentication for scheduled and automated workloads - Set Select Secret Source to From Secret Store for passwords, client secrets and key passphrases, to avoid holding credentials in the connection itself
- Always Test Connection before saving to ensure the configuration is correct
- Scope Database and Schema to limit how much metadata is synced on large accounts
- Verify the Warehouse is running and accessible to the connecting user
The Snowflake connector has no Schedule Sync field in the new UI. Metadata is refreshed from the connection's Refresh action and from Sync now on an individual object; for how the resulting history is presented, see the Metadata Timeline.